Boxy Potholder
I made myself something!
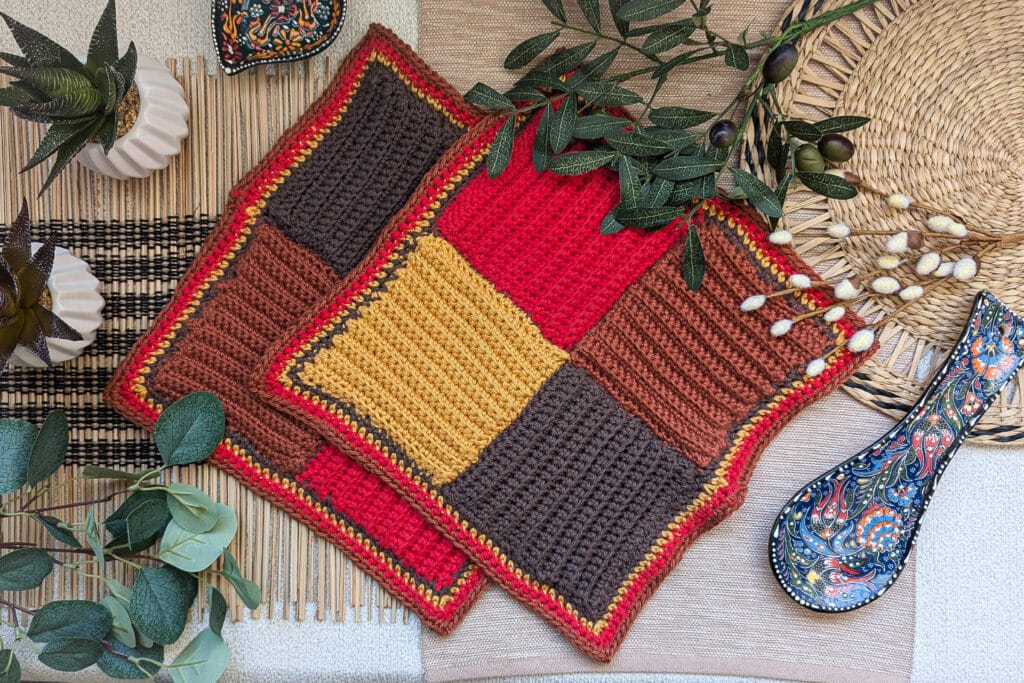
As much as I love the crochet hot pads I made for my kitchen a while back, I realized quickly they weren’t quite thick enough to grab stuff out of the oven. But because they’re round, folding them narrowed the area I could safely hold before coming too close to the source of heat. There were a few close-call occasions!
So I wanted something that was big enough to safely serve as a potholder but also matched the hot pads I’d already made. And so my crochet Boxy Potholders were born!
((Note: When I start any instructions down below, I will begin with US English instructions and put the UK English instructions after.))
Materials
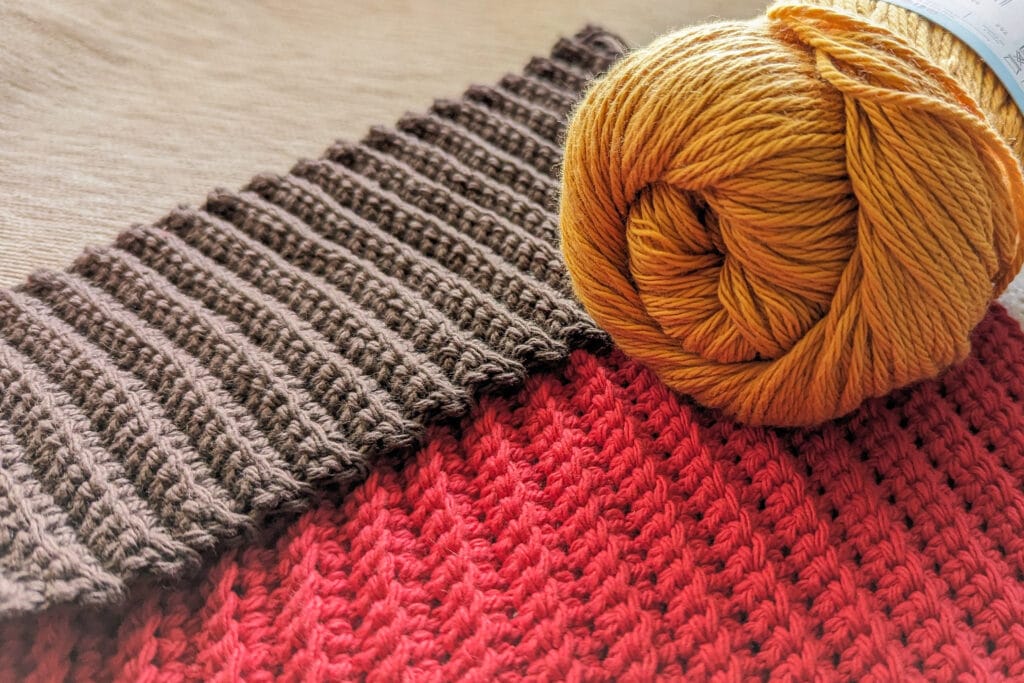
Materials:
5.0mm hook (US-H/8; UK/Canada-6)
100% Cotton medium weight yarn (worsted weight in US; Aran yarn in UK; 10-ply in Australia)
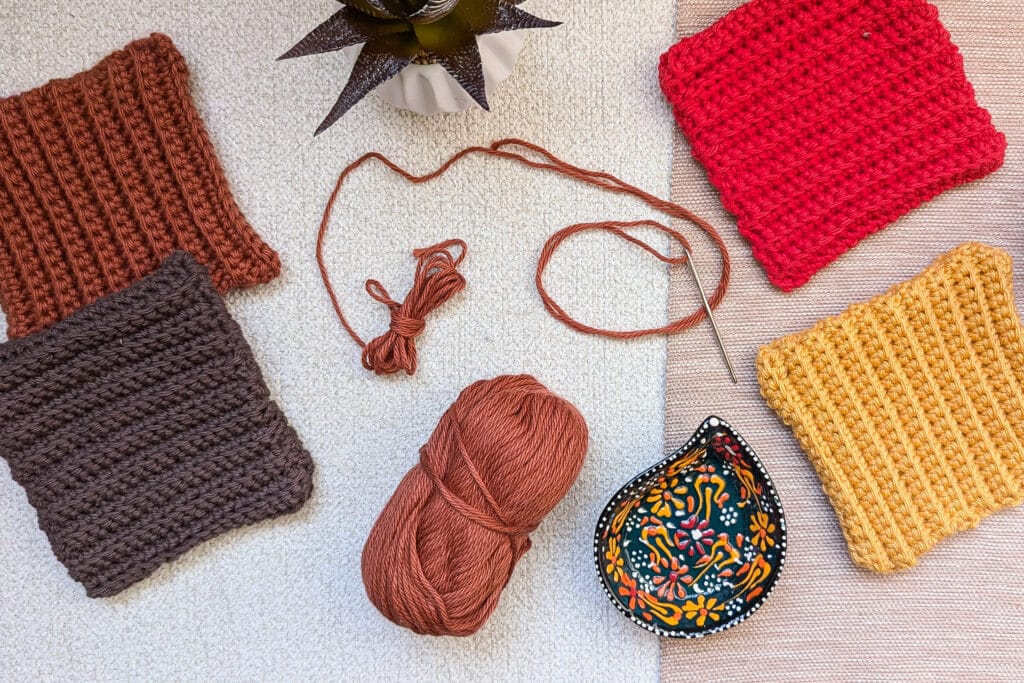
Tapestry needle
Scissors
(Optional: Stitch Markers)
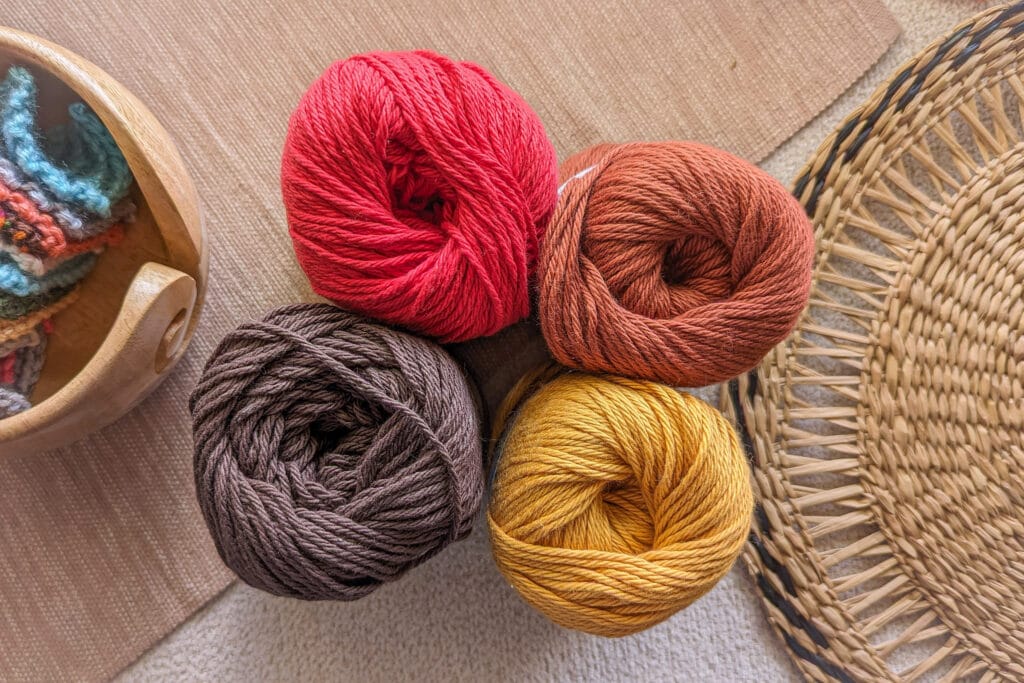
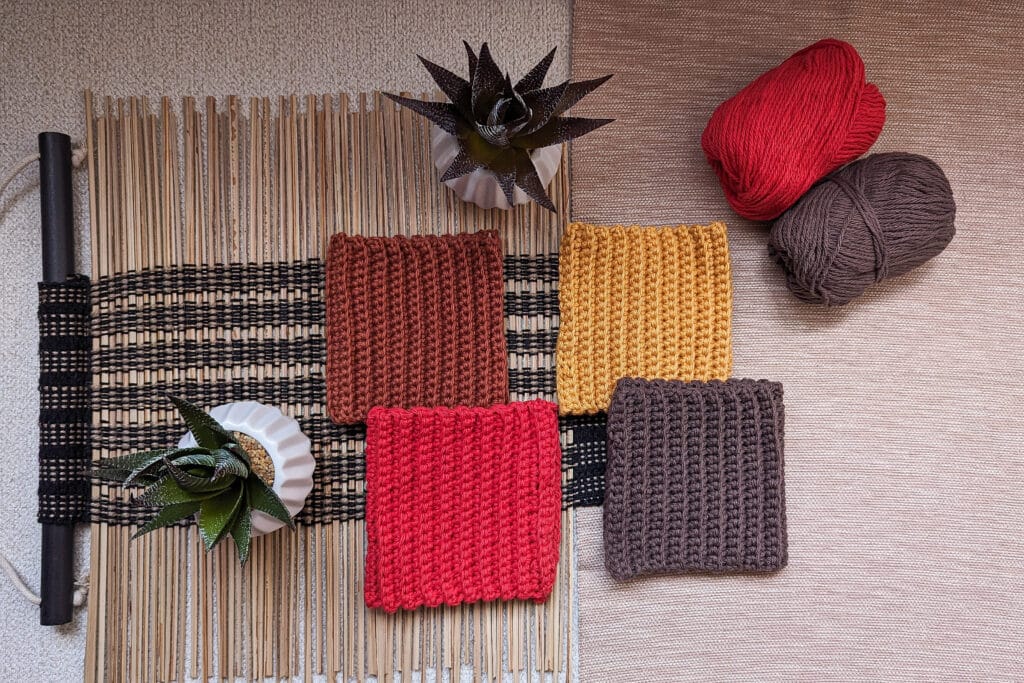
Yarns I Used:
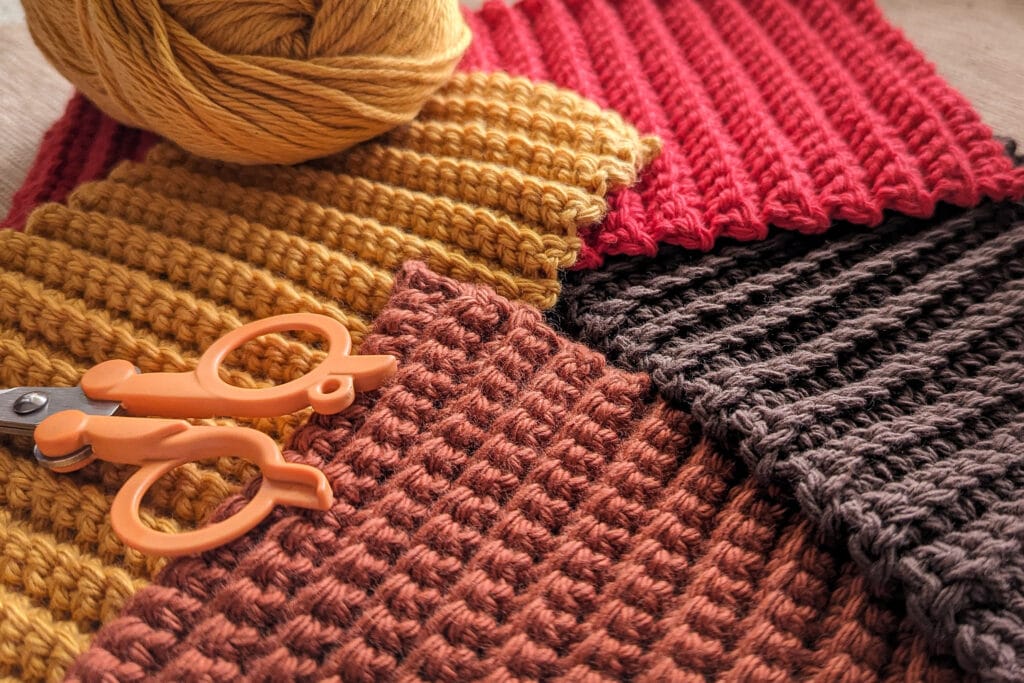
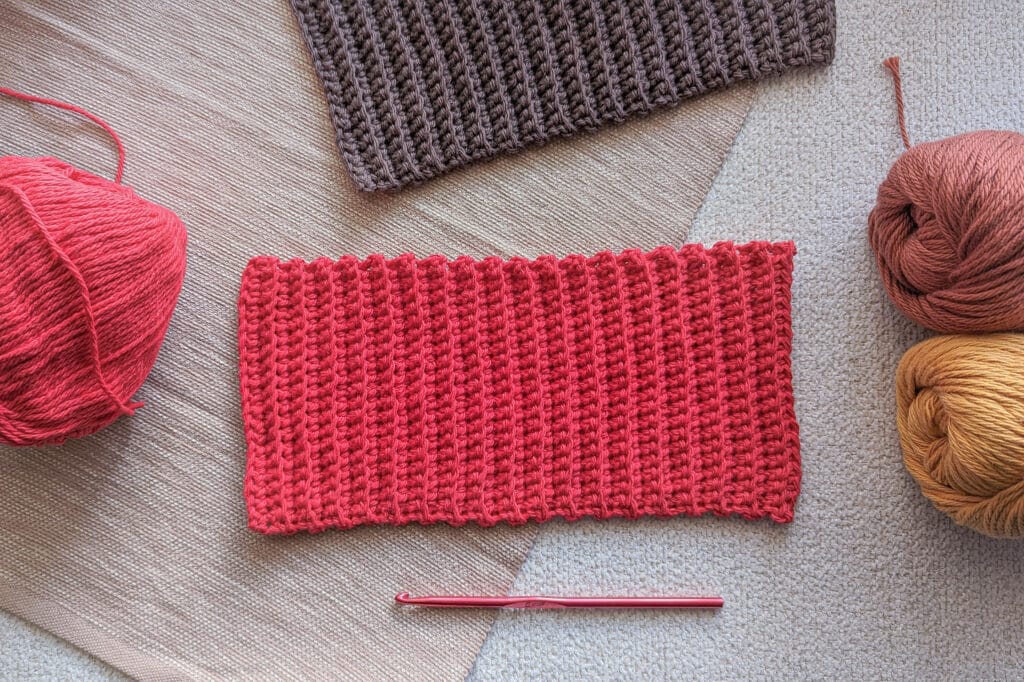
- Lily Sugar’n Cream in Warm Brown and Red
- Lion Brand Pima in Spice and Mineral
IMPORTANT: This might go without saying, but just in case someone needs the info… Be sure to use 100% cotton, bamboo, or wool yarn for any project that will be used to touch high temperatures. Acrylic or polyester yarns are likely to melt.
Notes and Abbreviations
Notes:
- Numbers at the end of the instructions: In brackets “[ ]” will be the total stitch count for that round.
- The first chain in each row/round does not count as your first stitch, so don’t skip your first stitch.
- This is made in four pieces that will be stitched together.
- The instructions are written to make a single potholder.
Abbreviations:
US English Abbreviations:
St(s) = stitch(es)
Ch(s) = chain(s)
Sl St = slip stitch
SC(s) = single crochet(s)
Rep = repeat
BLO = back loops only
UK English Abbreviations:
St(s) = stitch(es)
Ch(s) = chain(s)
SS = slip stitch
DC(s) = double crochet(s)
Rep = repeat
BLO = back loops only
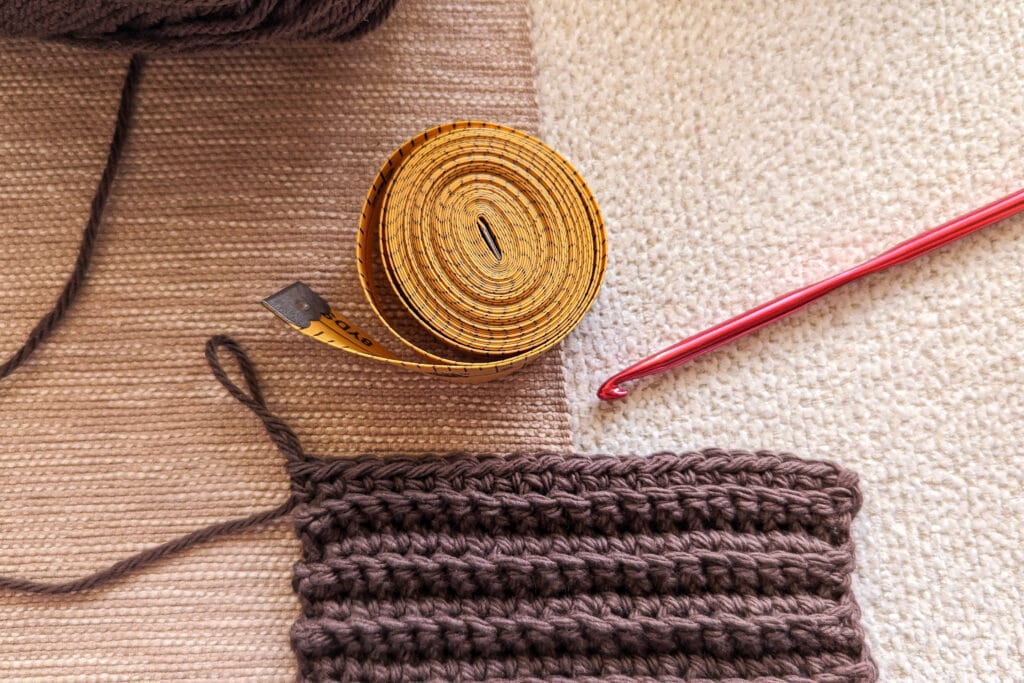
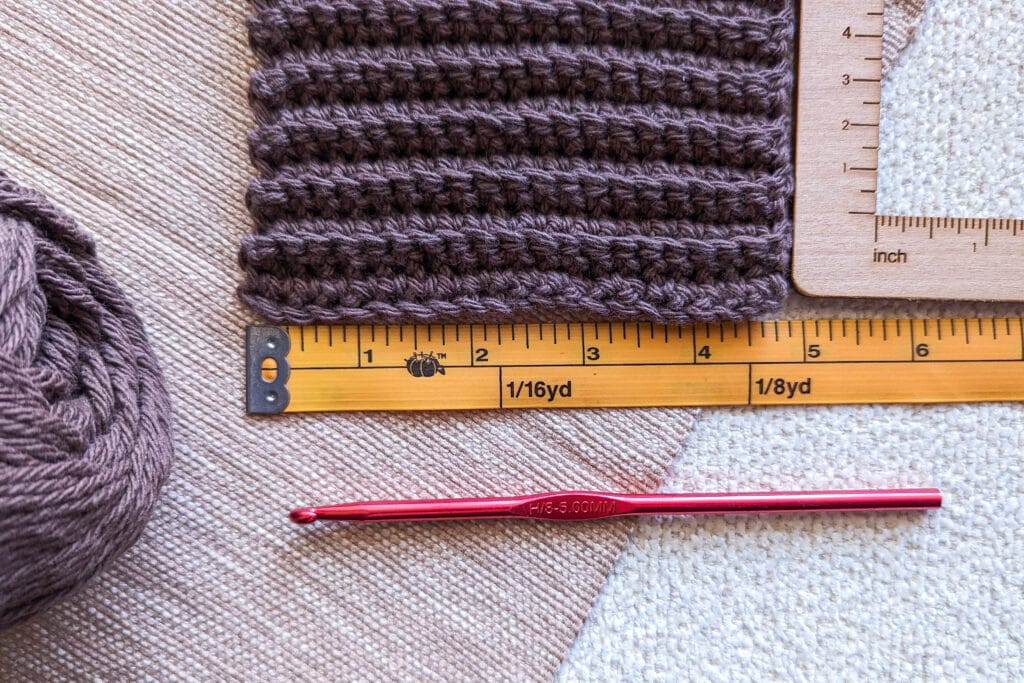
Gauge / Tension
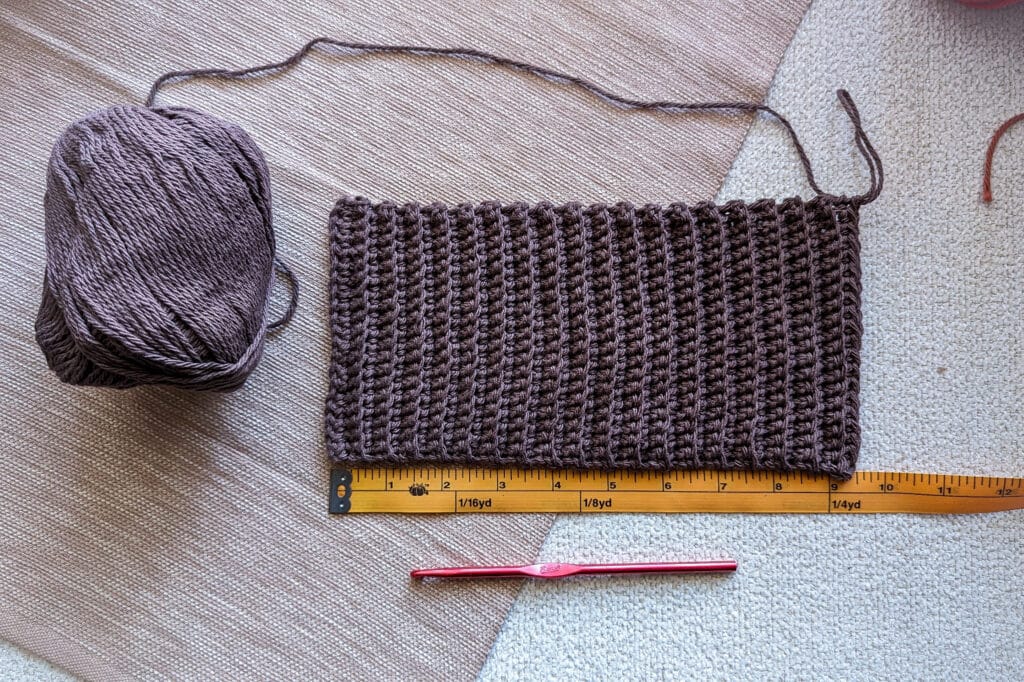
Approximately 4.5 x 4.5 in (11.5 x 11.5 cm)
20 sts by 18-19 rows
US English Gauge Instructions:
1. Ch 21
2. Turn. SC 1 in the 2nd ch from the hook. SC in each ch across. [20 sts]
3. Ch 1, turn. SC 1 in the BLO of the first St. SC in the BLO in each St across. [20 sts]
4-19/20. Rep R3. [20 sts]
UK English Tension Instructions:
1. Ch 21
2. Turn. DC 1 in the 2nd ch from the hook. DC in each ch across. [20 sts]
3. Ch 1, turn. DC 1 in the BLO of the first St. DC in the BLO in each St across. [20 sts]
4-19/20. Rep R3. [20 sts]
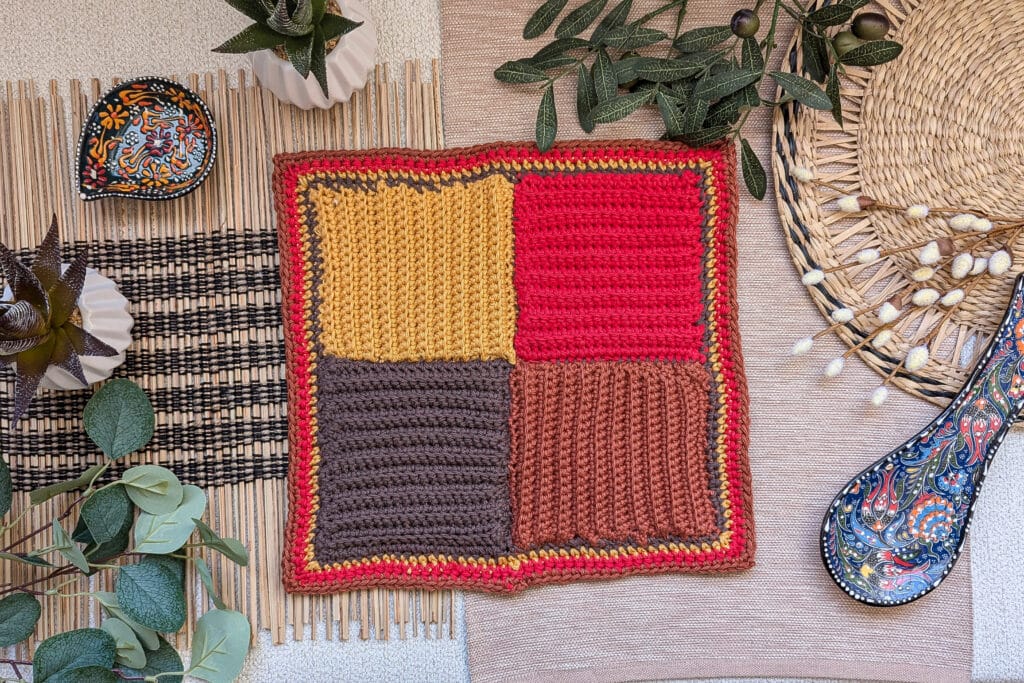
Instructions for the Crochet Boxy Potholder
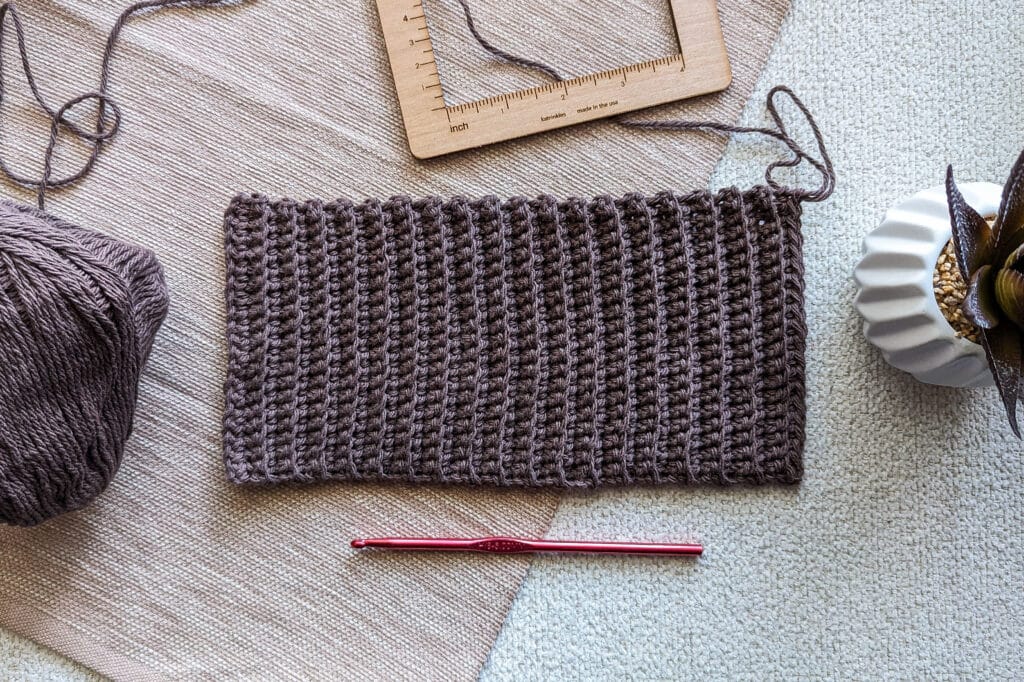
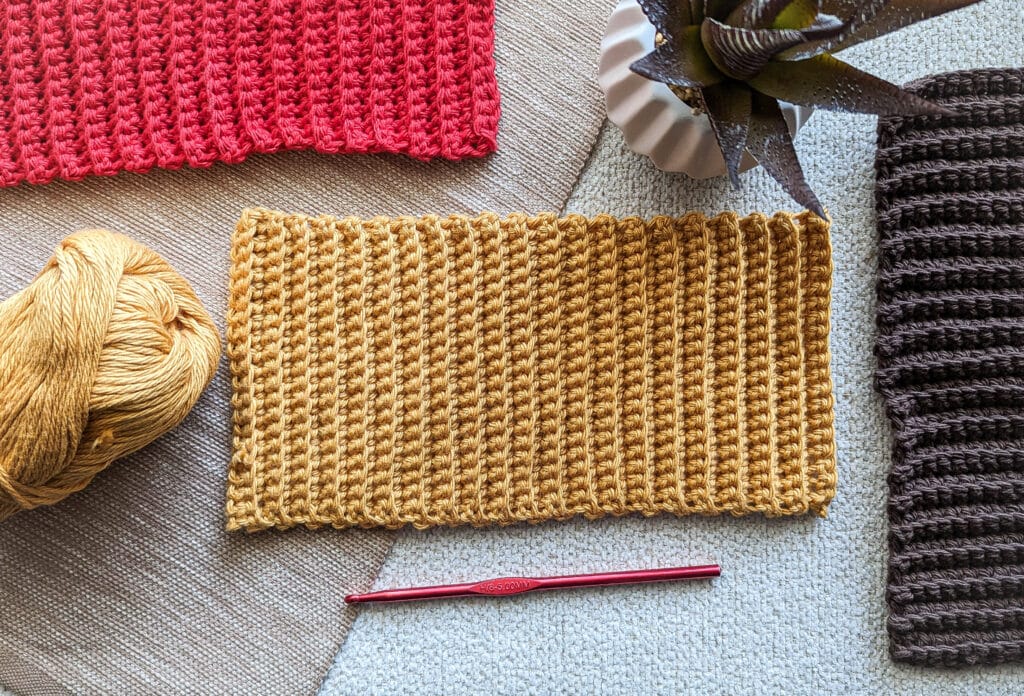
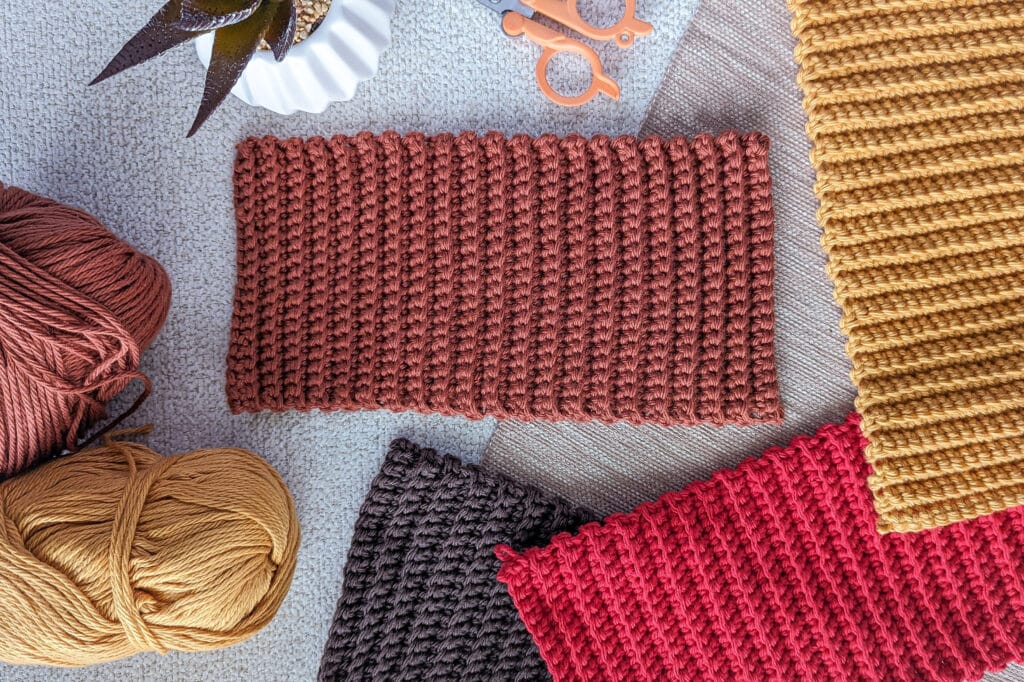
This crochet pattern is worked in four separate pieces that will be attached afterward. Each initial piece is will come to approximately 4.5 inches by 9 inches (11.5cm by 23cm).
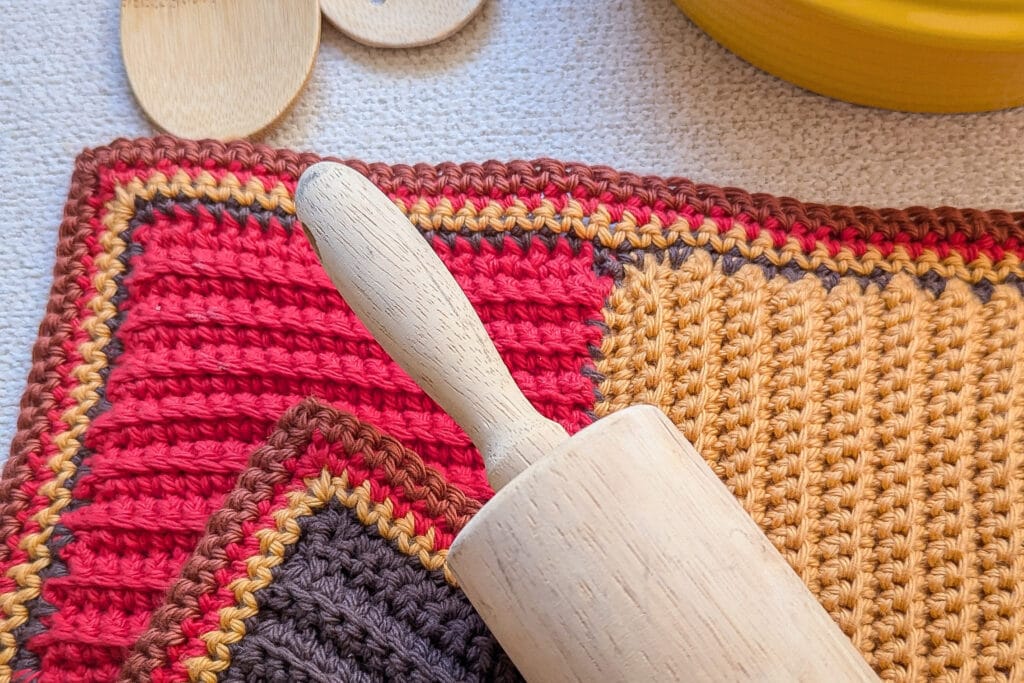
The border I chose was a simple set of single crochet stitches (double crochet, UK), but you can choose whatever works to your taste.
US English Boxy Potholder Pattern Instructions:
With each color, make one piece following the instructions below.
1. Ch 21
2. Turn, SC 1 in the 2nd Ch from the hook. SC 1 in each Ch across. [20 sts]
3. Ch 1, turn. SC 1 in the BLO in each St across the 1st St. [20 sts]
4-38. Rep R3 [20 sts]
UK English Boxy Potholder Pattern Instructions:
With each color, make one piece following the instructions below.
1. Ch 21
2. Turn, DC 1 in the 2nd Ch from the hook. DC 1 in each Ch across. [20 sts]
3. Ch 1, turn. DC 1 in the BLO in each St across the 1st St. [20 sts]
4-38. Rep R3 [20 sts]
Assembly
And now to assemble your pieces!
Step 1:
You’ll be using your tapestry needle and about one yard (91.5cm) of the yarn that matches the rectangular piece you’ll be working.
Fold one rectangular piece in half to form a square. I kept everything lined up and straight by attaching stitch markers to my corners and the center of each open side.
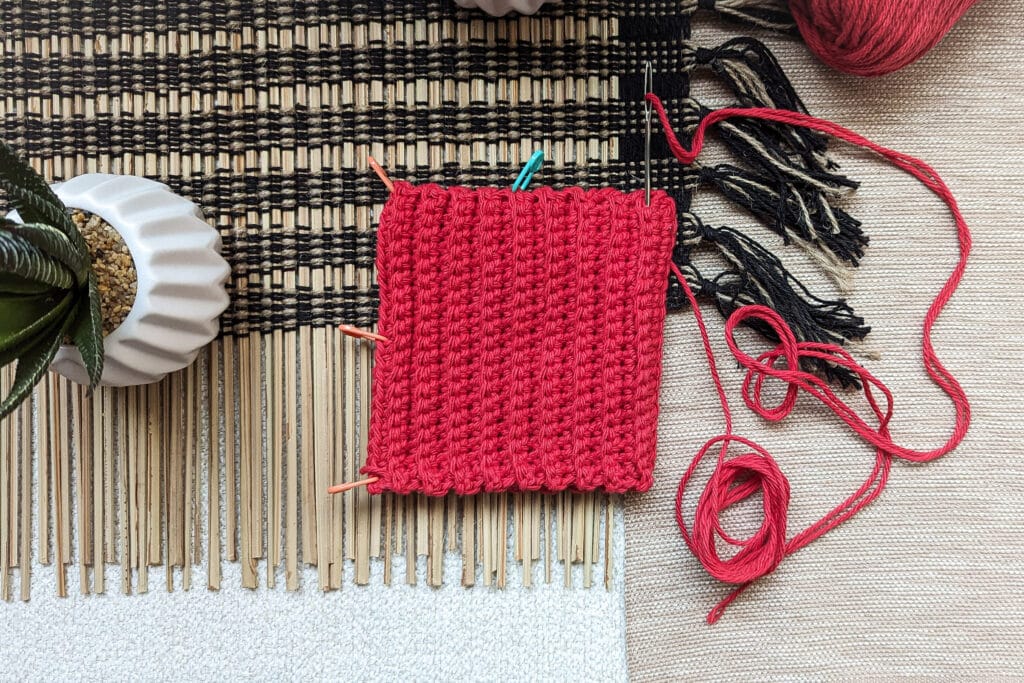
Attach the yarn one of the corner beside the folded side and use a straight whip stitch along the open edge to close up your square. Be sure to leave a couple of inches open so you can turn the piece inside out; this will leave leave your sewn up sides more hidden. Then finish up closing your open edge. End off and weave in the ends.
Repeat this for each rectangular piece with its matching yarn. You should have four folded square pieces.
Step 2:
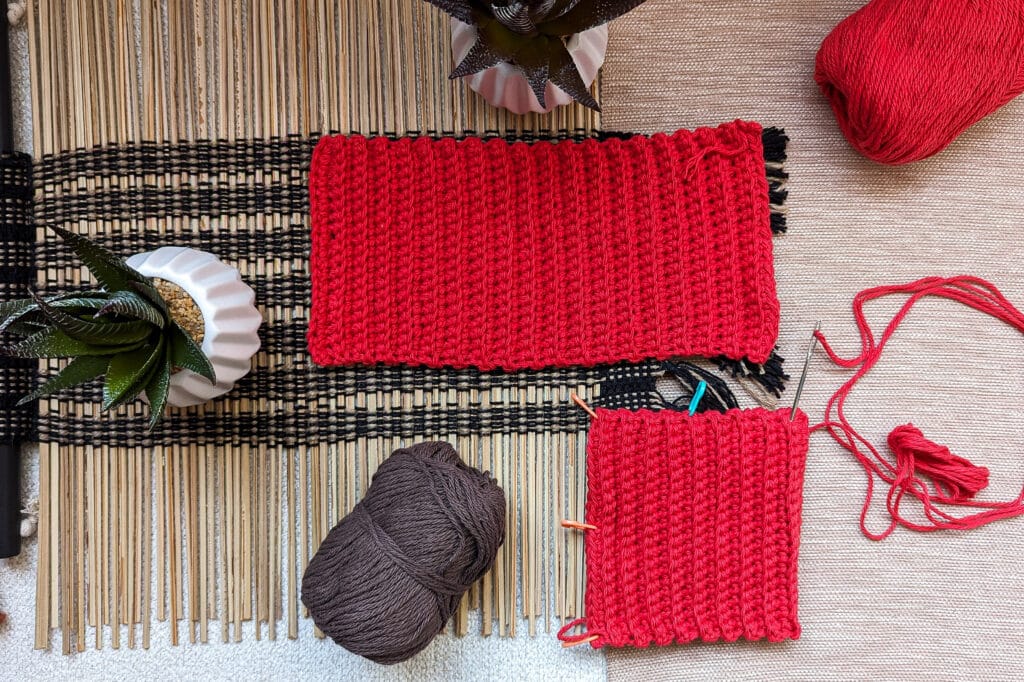
When you have all four squares stitched up, it’s time to attach them.
Line up the squares so that the rows of one square are perpendicular to the rows of the squares next to it but in the same direction as the one adjacent to it. Which is a wordy way of saying that you shouldn’t make all your squares’ rows face the same direction.

When I had mine line up, I used stitch markers to connect my squares at their touching corners, so that when I stitched along the center of the piece, even if it got twisted, I would still be able to find the outer edge and keep my squares’ rows perpendicular.
Using approximately two yard (183cm) of a yarn color of your choice, you will straight whip stitch your way between the first two squares and then the next two squares. Loosely weaving your yarn along one square’s outer edge and around the corner, then stitch your way down the center from the other direction to close all your middle area up. End off and weave in the end.
Step 3:
As mentioned before, you can use whichever border stitching you prefer. But I chose a simple border of single crochet stitches (double crochet, UK) for mine. This meant that for the first round, each stitch and each row from a square would have one single crochet in it, and the corners would be done in with 2 loose chain stitches before turning to work along the new side.
Repeat this process for each round, making an extra single crochet in the corner 2-chain space, then chain 2 loosely, then one more single crochet in the corner space.
When you have as many rows as you want, end off and weave in the ends.
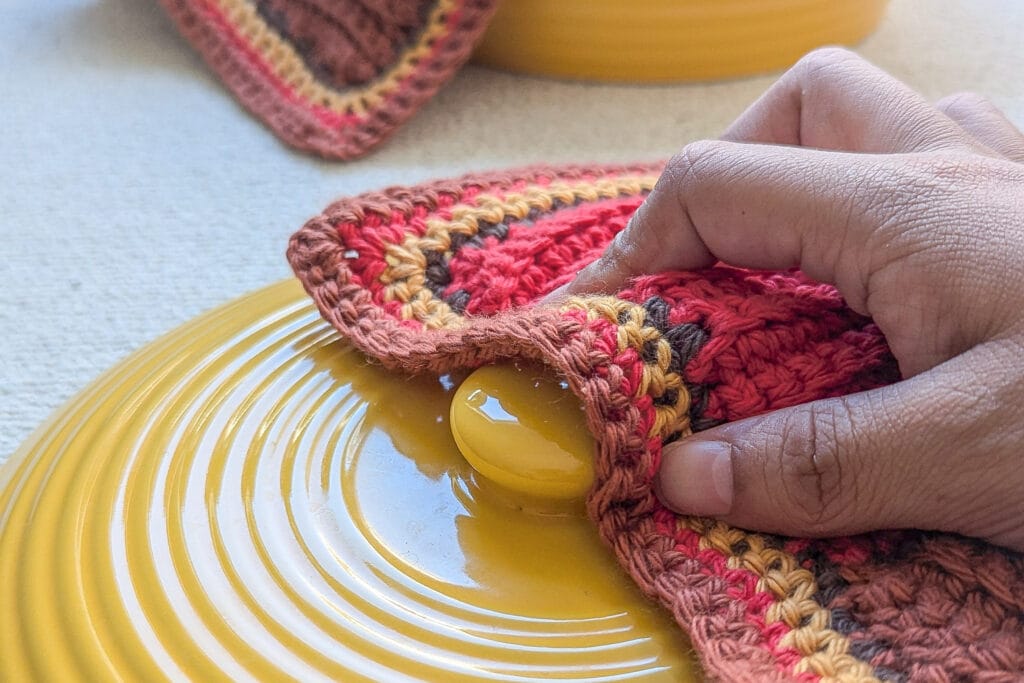
Tah Dah!
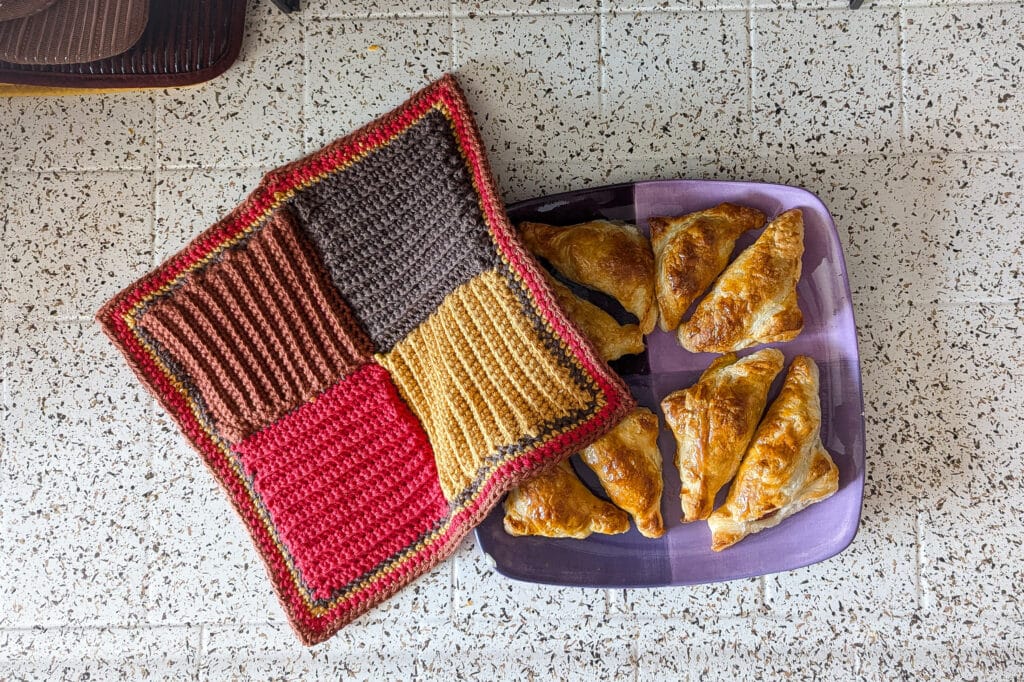
And there you have it! A crochet Boxy Potholder, ready for kitchen use.
Remember to drink water, have a snack if you haven’t eaten, and pause and stretch a bit if you’ve been down too long.
And remember that you can follow Family Craft Studio on Instagram, Pinterest, and Facebook.
Happy crafting!