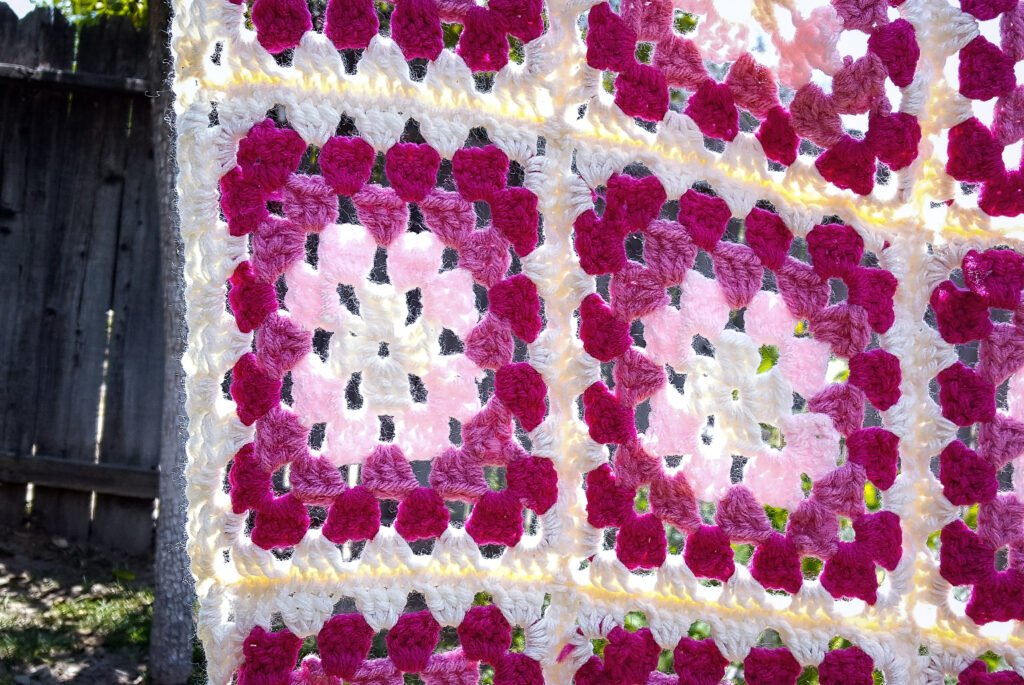
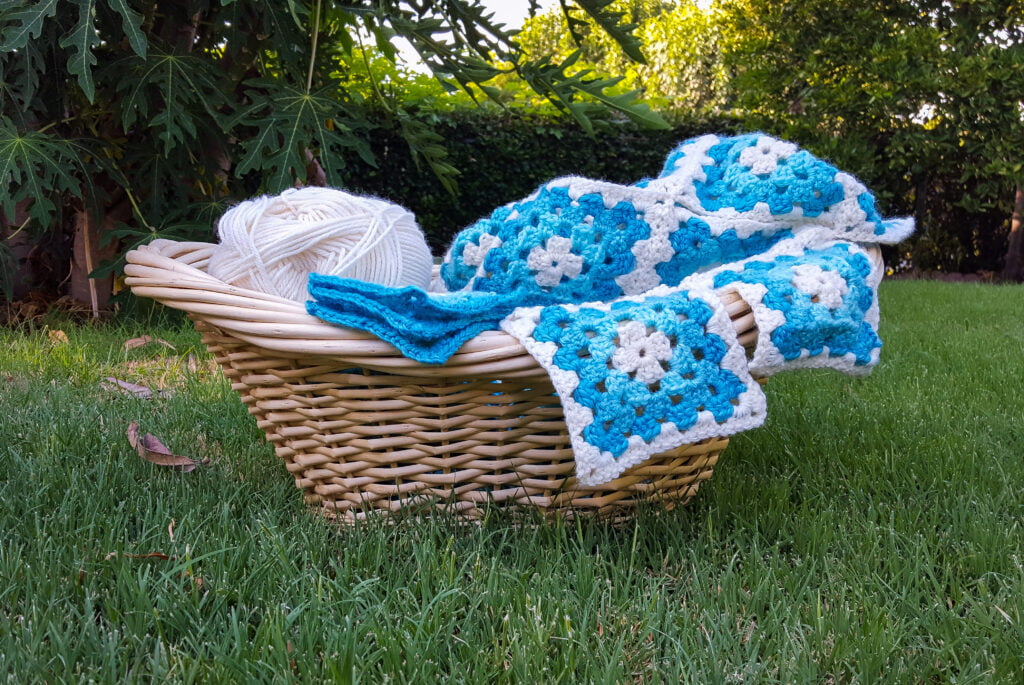
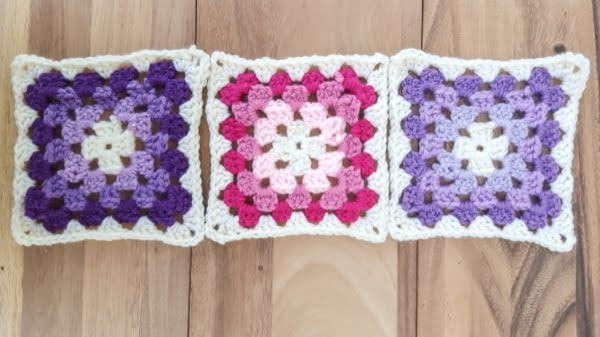
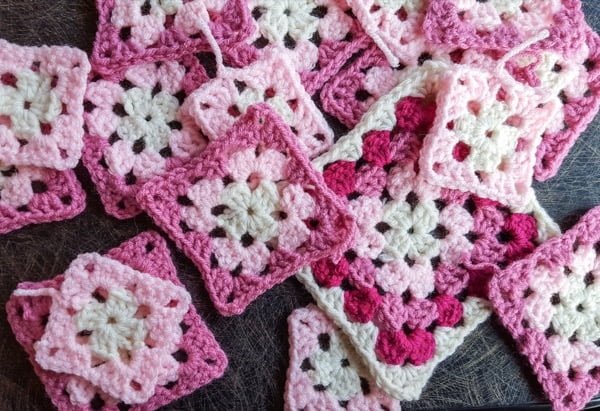
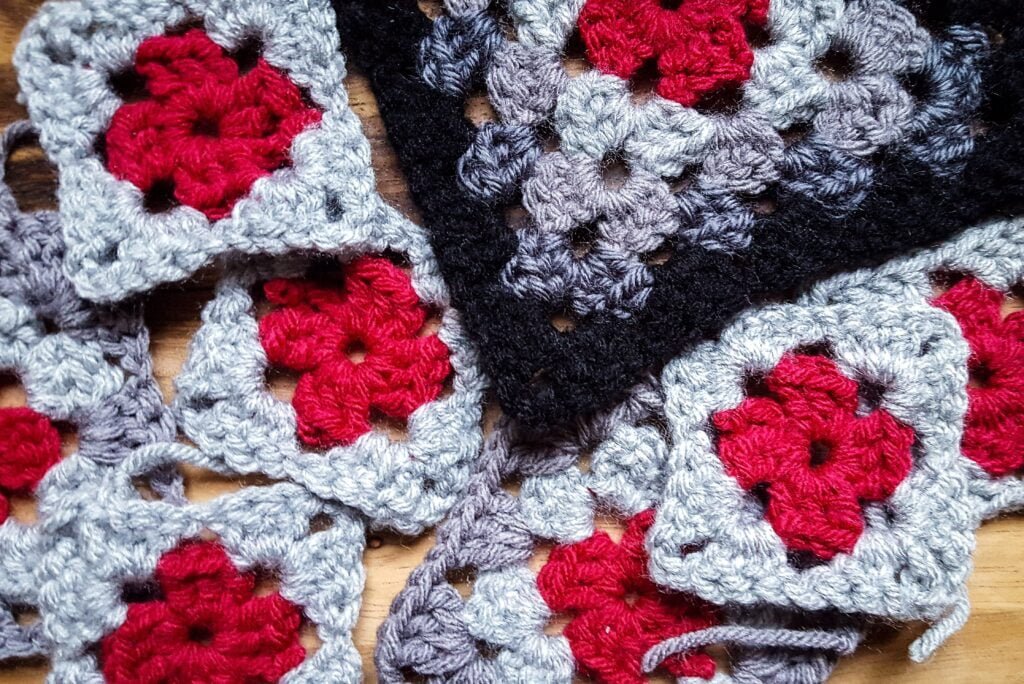
Granny Squares
One of the first things I ever learned to crochet–perhaps one of the first things many of us learned–was a granny square.
Mom taught me two ways to make one: a one-sided square, where all rounds faced the same direction, and a two-sided square, where rounds alternated which direction they faced.
This makes some slightly notable differences depending on the effect one wants for their squares and what sort of project one is using them in. A bag, for example, might benefit from all the rounds of a granny square facing the same way so that whichever side faces outward will be uniform.
So give these a try and see which works best for your project.
((Note: When I start any instructions down below, I will begin with US English instructions and put the UK English instructions after.))
Materials
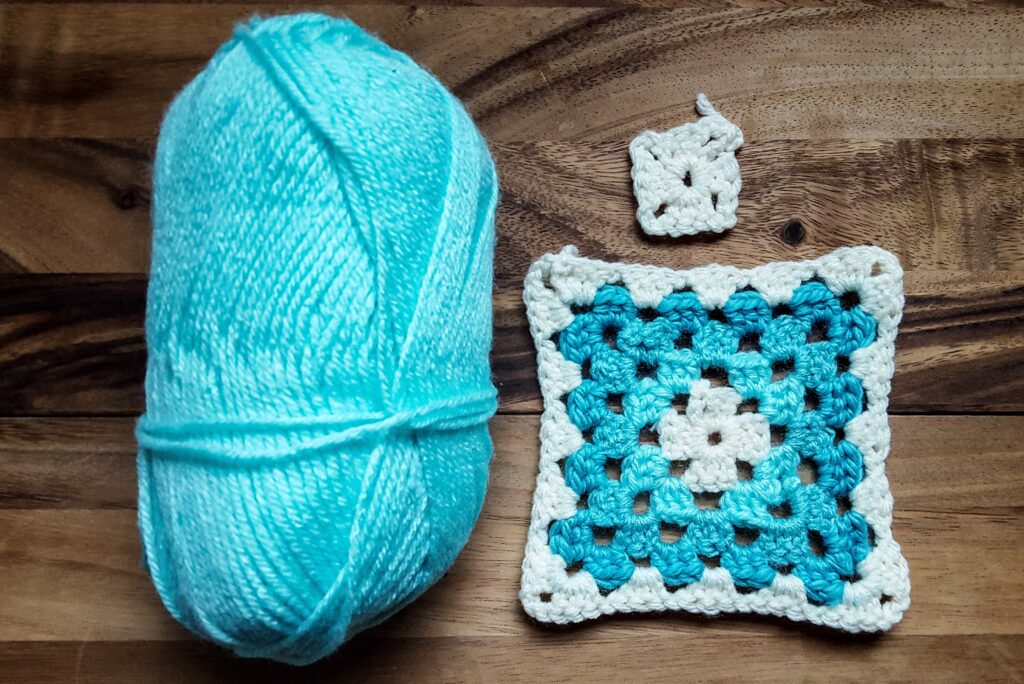
Granny squares can be made with yarn of any thickness. For this example, I used the material listed below. But for your own projects, your preferred yarn will likely include information on the sort of weight it is and have a recommended hook size for it. If it doesn’t include a hook size, you can use the weight of the yarn and look up hook sizes recommended for that thickness.
Yarns I Used:
5.5mm hook (US-I/9; UK/Canada-5)
medium weight yarn (worsted weight in US; Aran yarn in UK; 10-ply in Australia)
Notes and Abbreviations
Notes:
- This pattern is worked in rounds.
- For the one-sided square: you will NOT turn the project at the beginning of each round; this gives you the one-sided look.
- For the two-sided square: you WILL turn at the beginning of each round; this gives you that two-sided look.
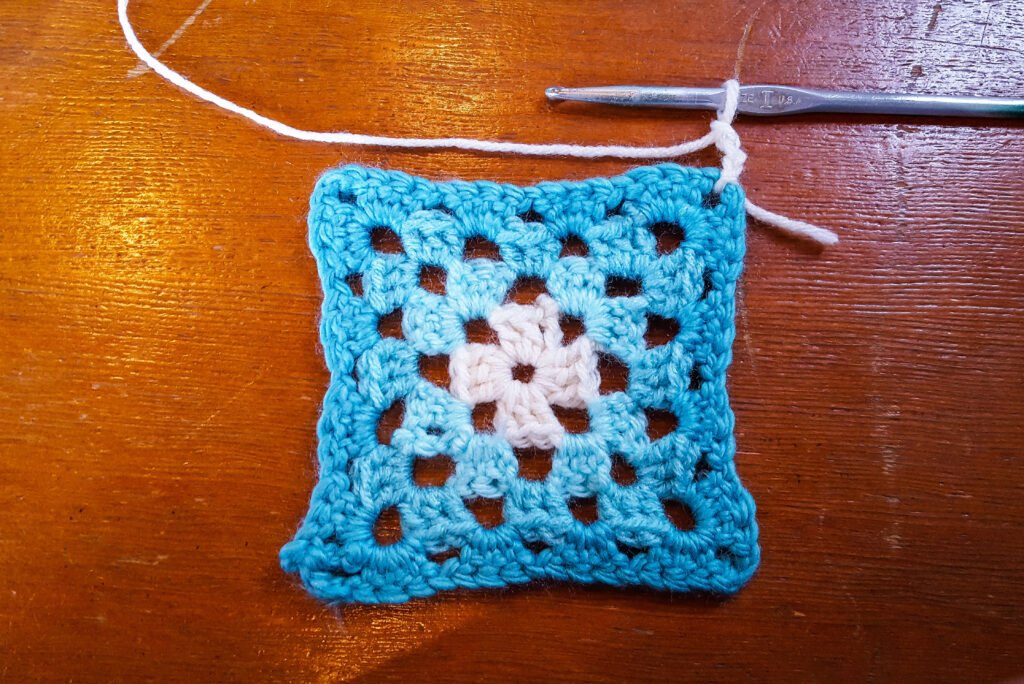
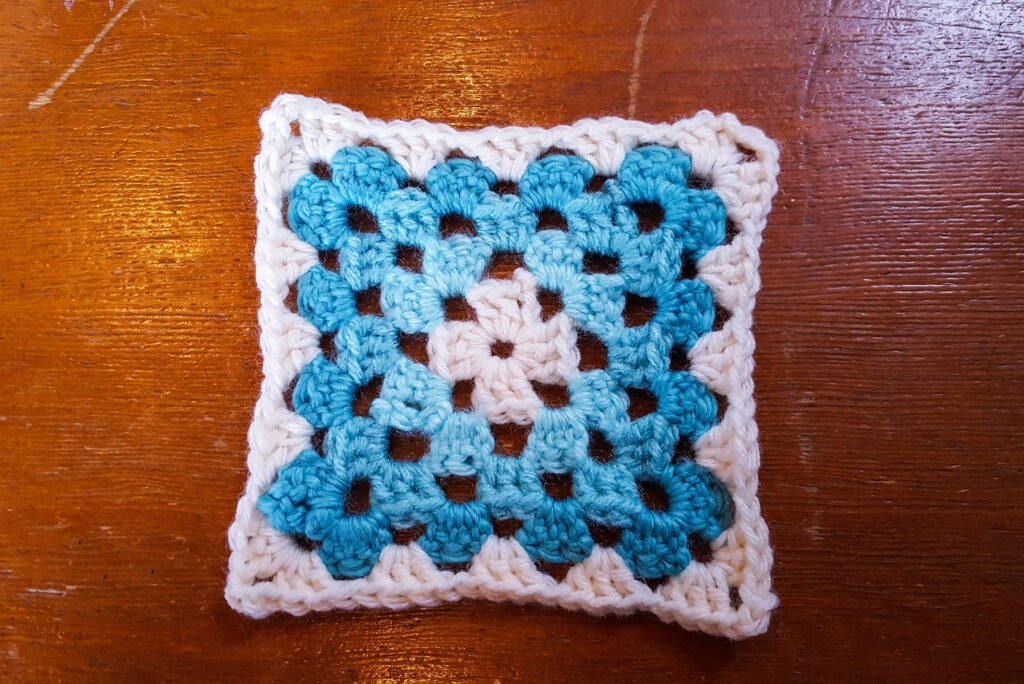
- For the changing-colors squares: You’ll end off (cast off) your yarn at the end of each round, BUT you will attach the new color to a different corner; this allows you to avoid having so many knot-bumps on one corner or any of the sides of your squares.
- For the changing-colors square, I’ll be writing instructions as though each round is changing colors, but the same idea works for attaching a new color at any desired point.
Abbreviations:
US Abbreviations:
St(s) = stitch(es)
Sp(s) = space(s)
Ch(s) = chain(s)
Sl St = slip stitch(es)
DC(s) = double crochet(s)
Rnd(s) = round(s)
Rep = repeat
UK Abbreviations:
St(s) = stitch(es)
Sp(s) = space(s)
Ch(s) = chain(s)
SS = slip stitch(es)
TR(s) = treble crochet(s)
Rnd(s) = round(s)
Rep = repeat
Gauge
The gauge of the square depends on how your stitches come together and the materials you use. This can vary widely with different hook sizes, yarn weights (thicknesses), and stitch tightness, so experiment to see which one works best for you and your project.
My Gauge:
First Round: approximately 1.5 inches across (Approx. 3.8cm)
Each Round After: adds approximately 1 inch (Approx. 2.5cm).
Example:
A 5-round square is approximately 5.5 inches (Approx. 13.5-14cm)
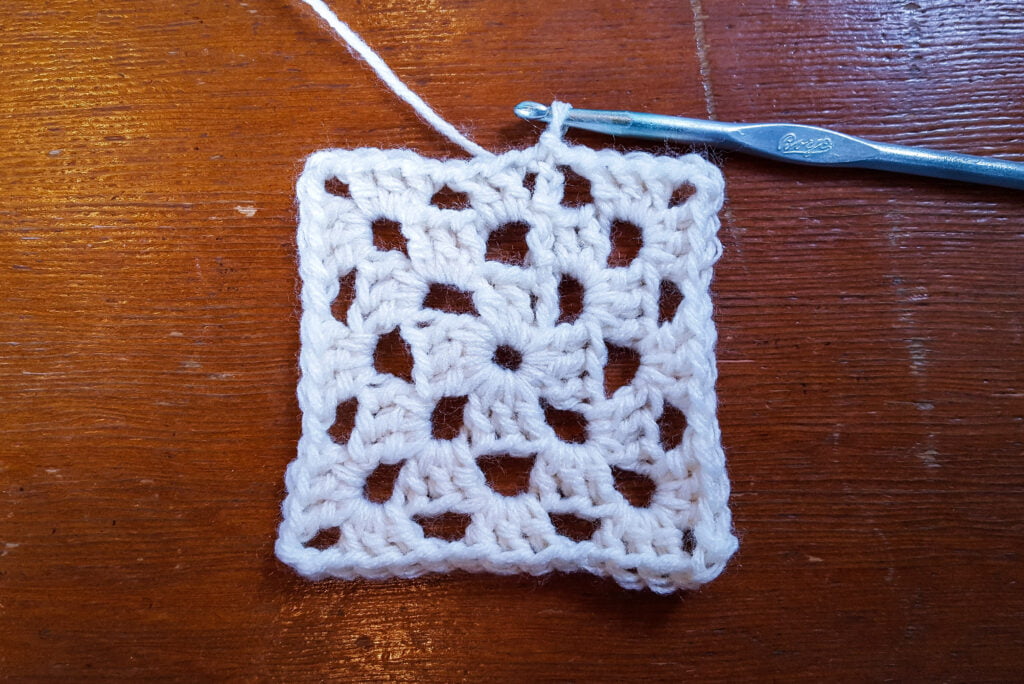
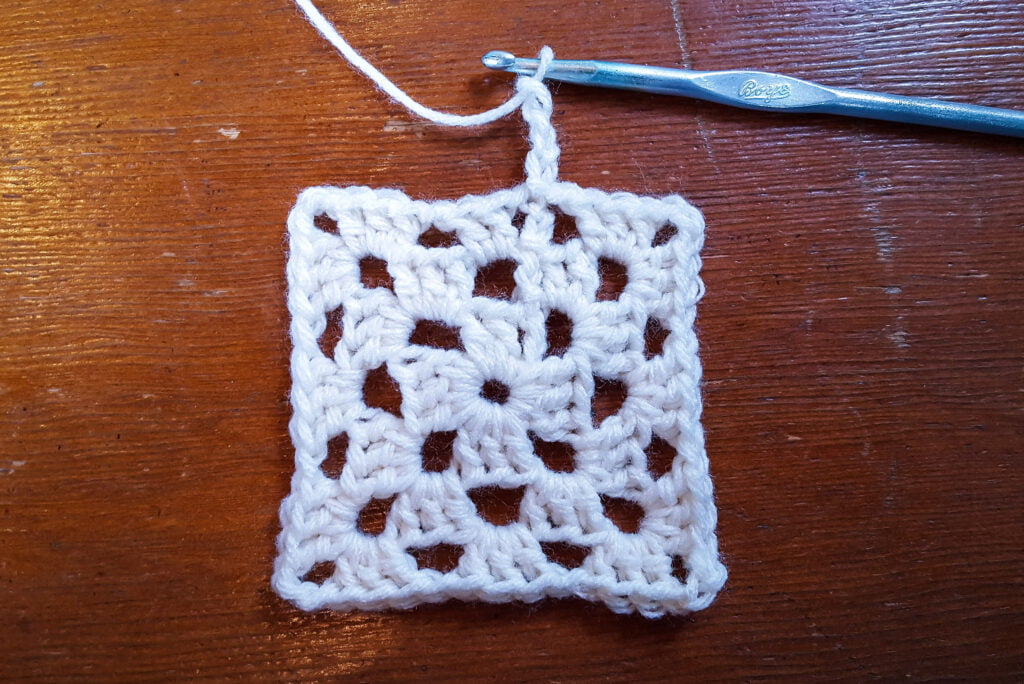
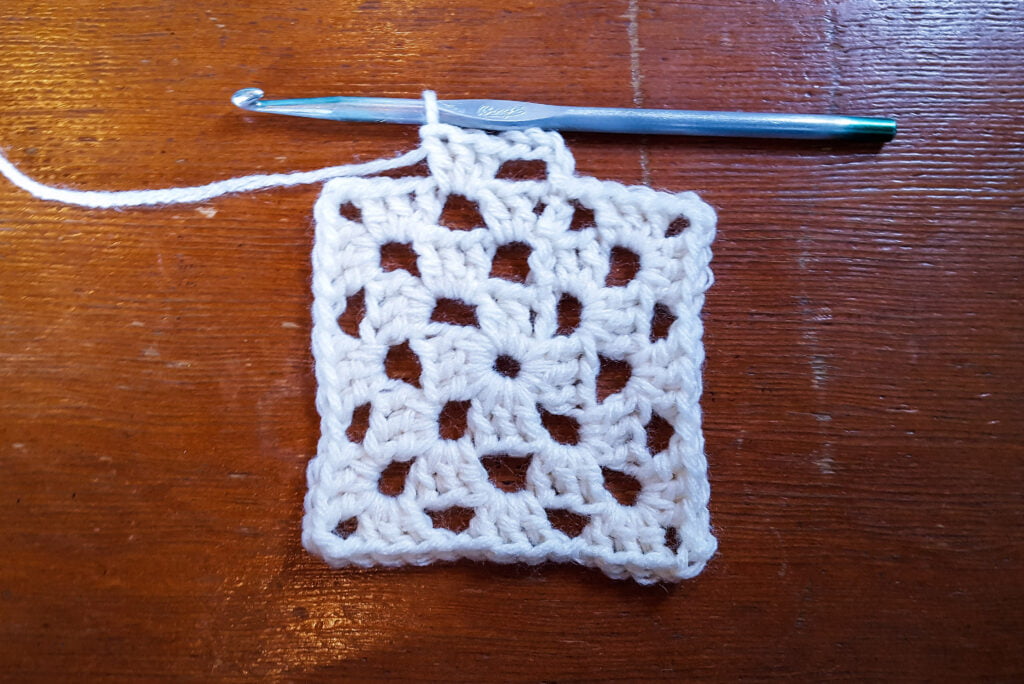
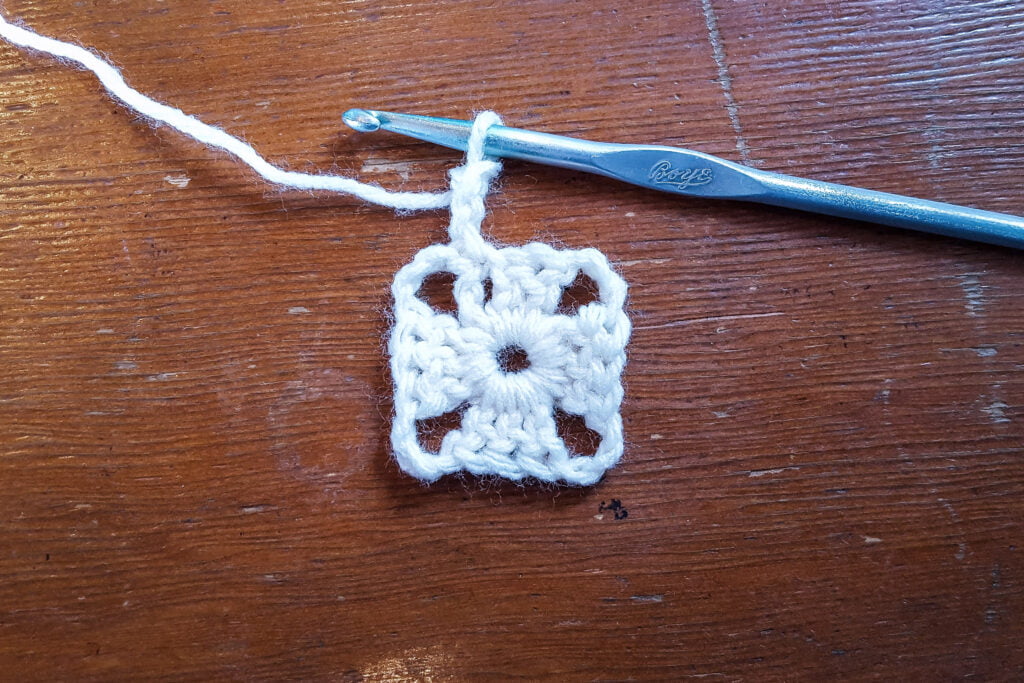
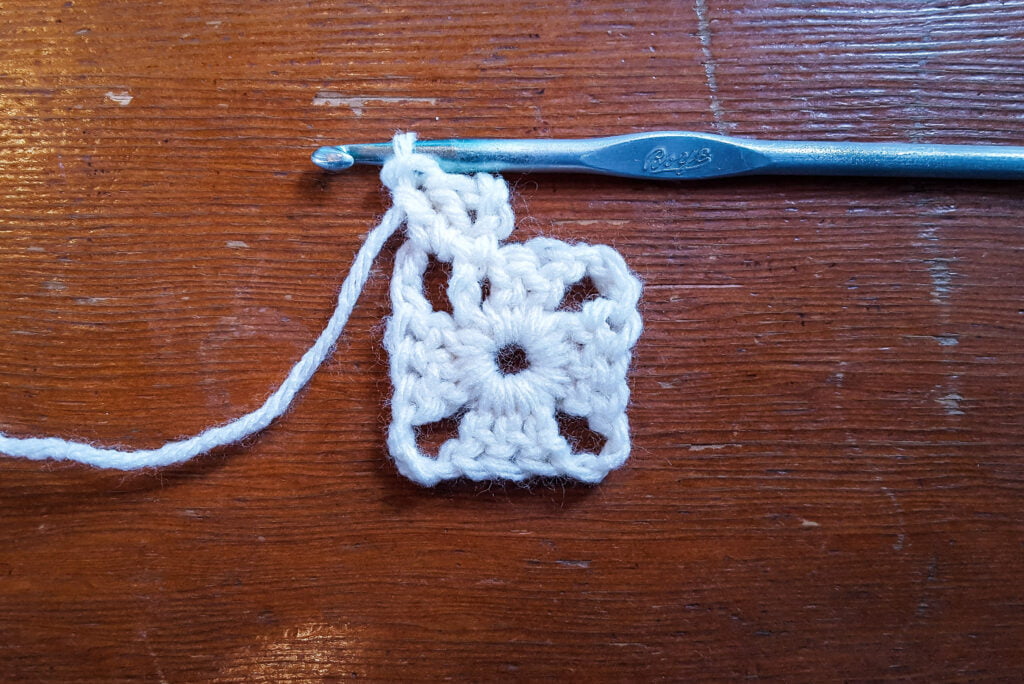
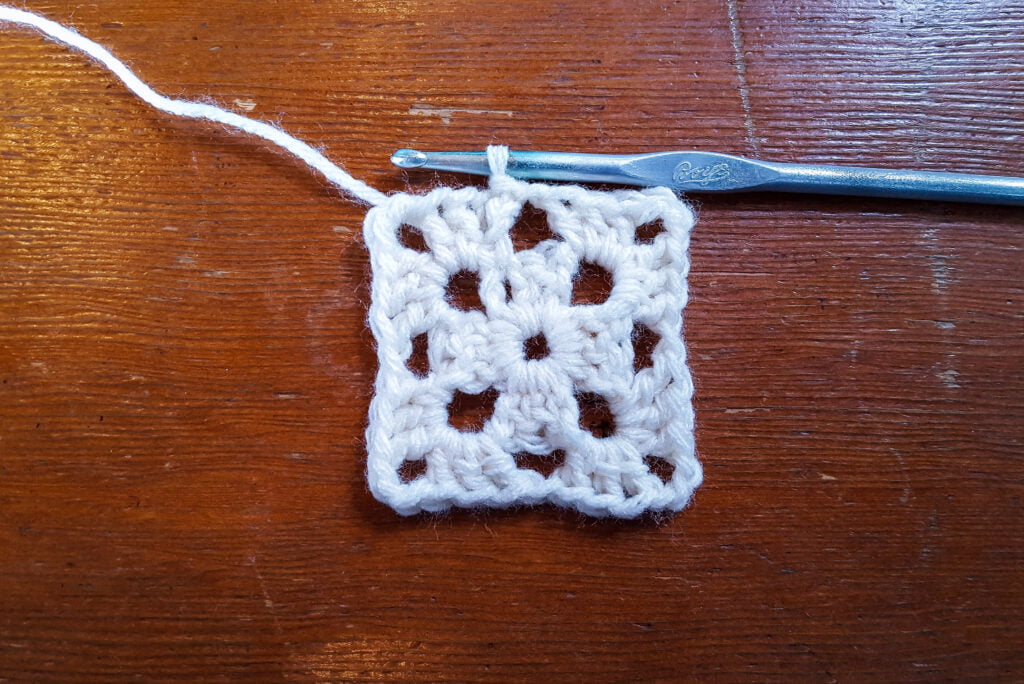
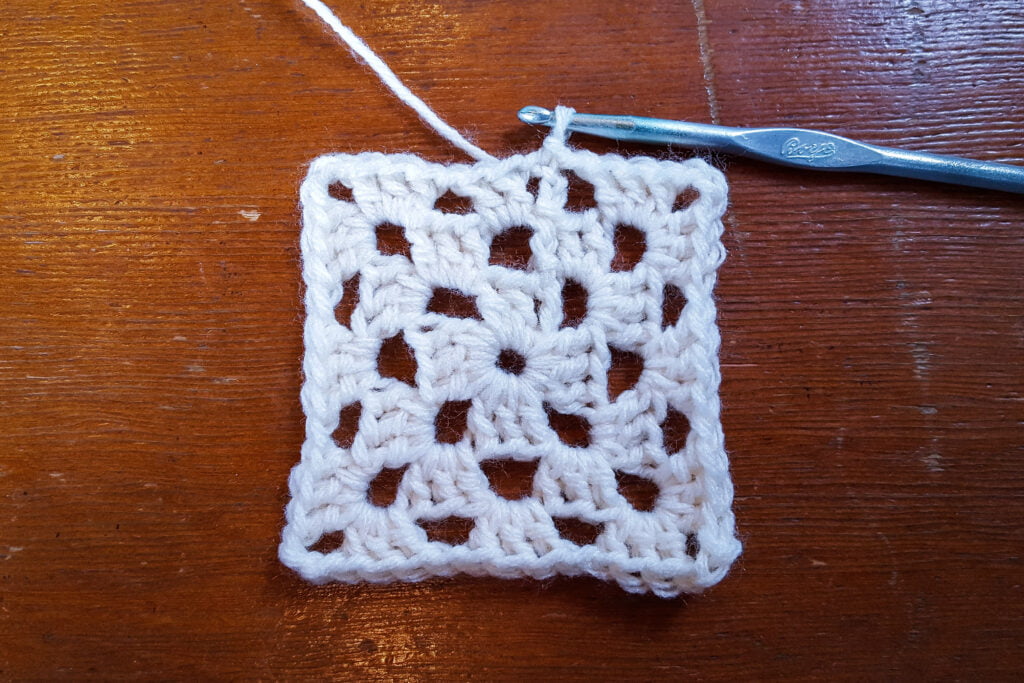
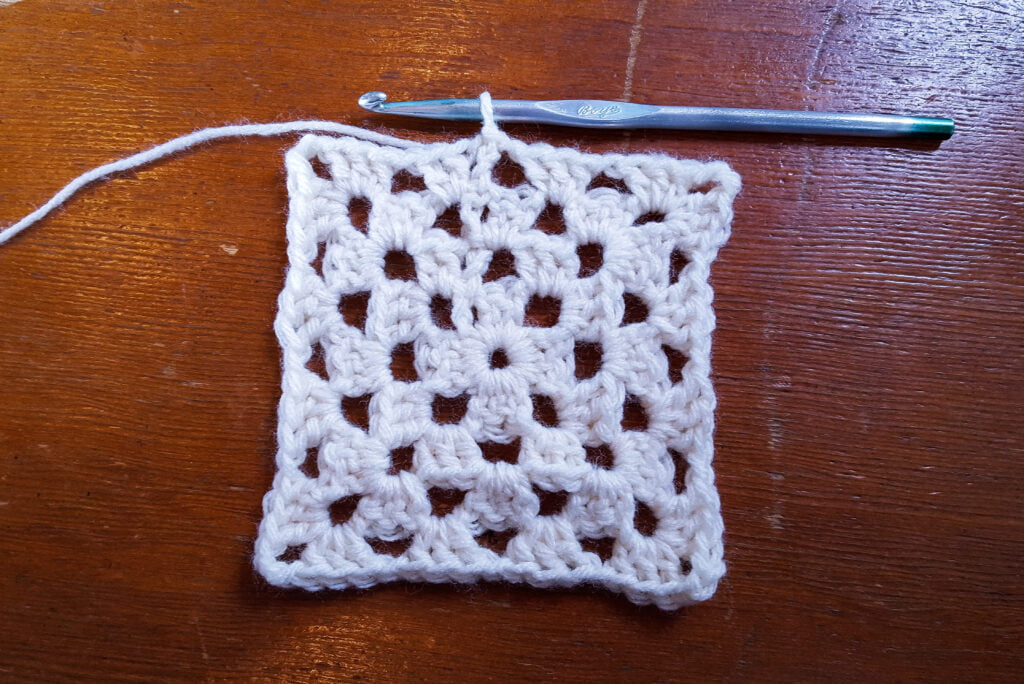
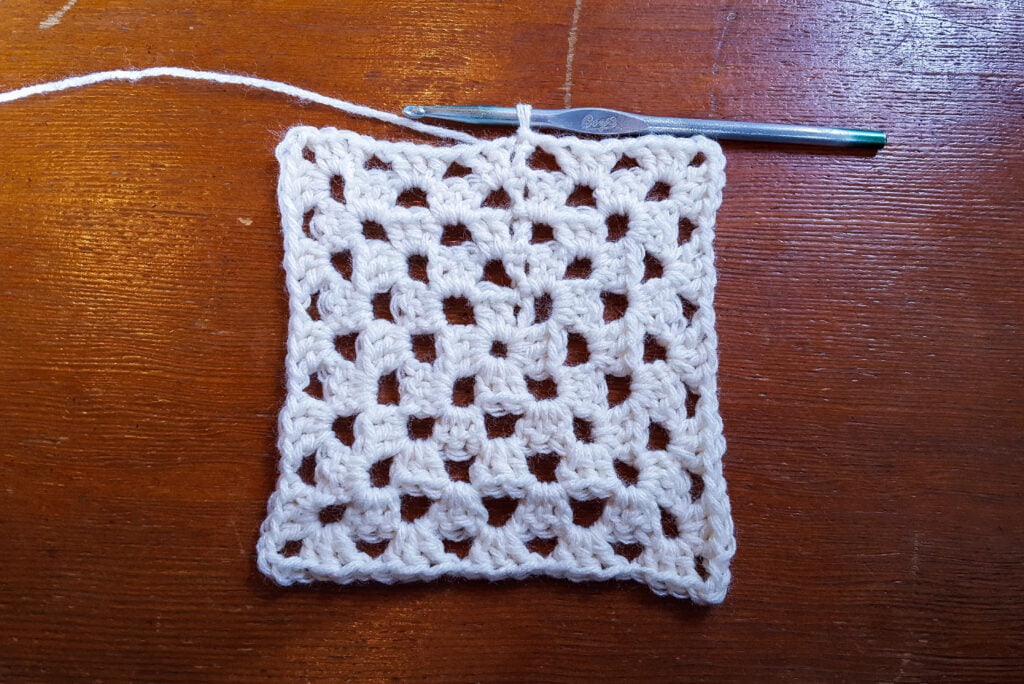
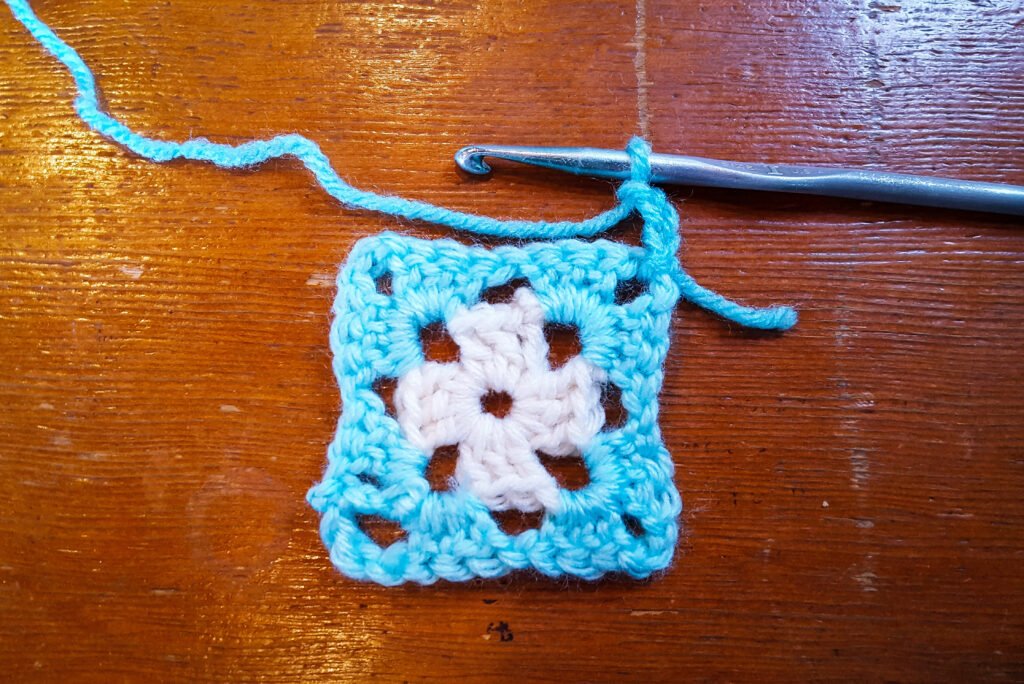
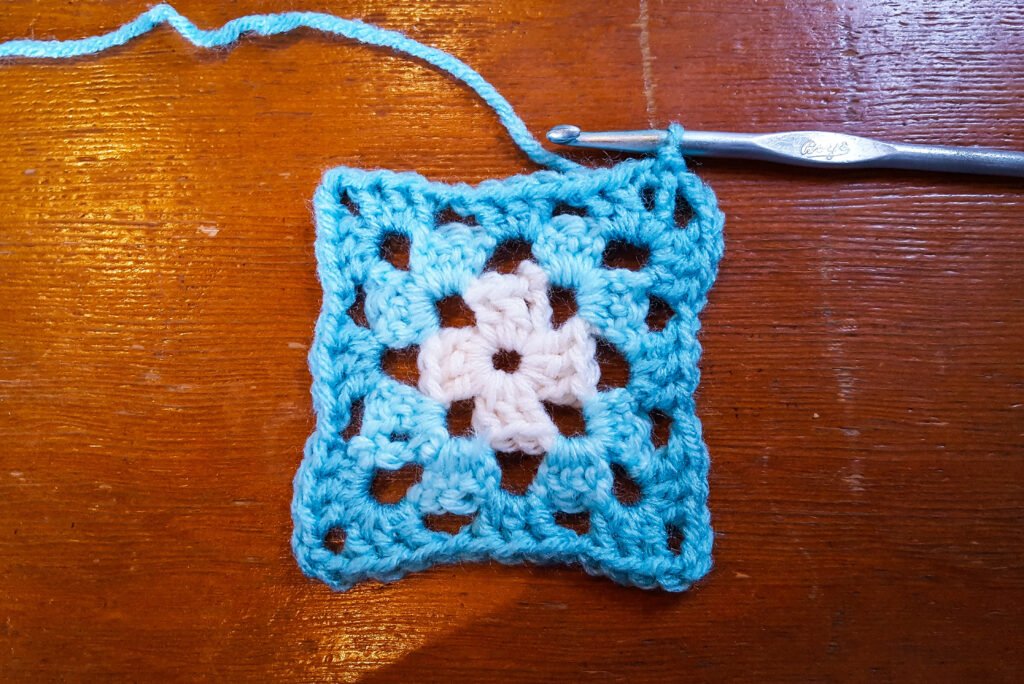
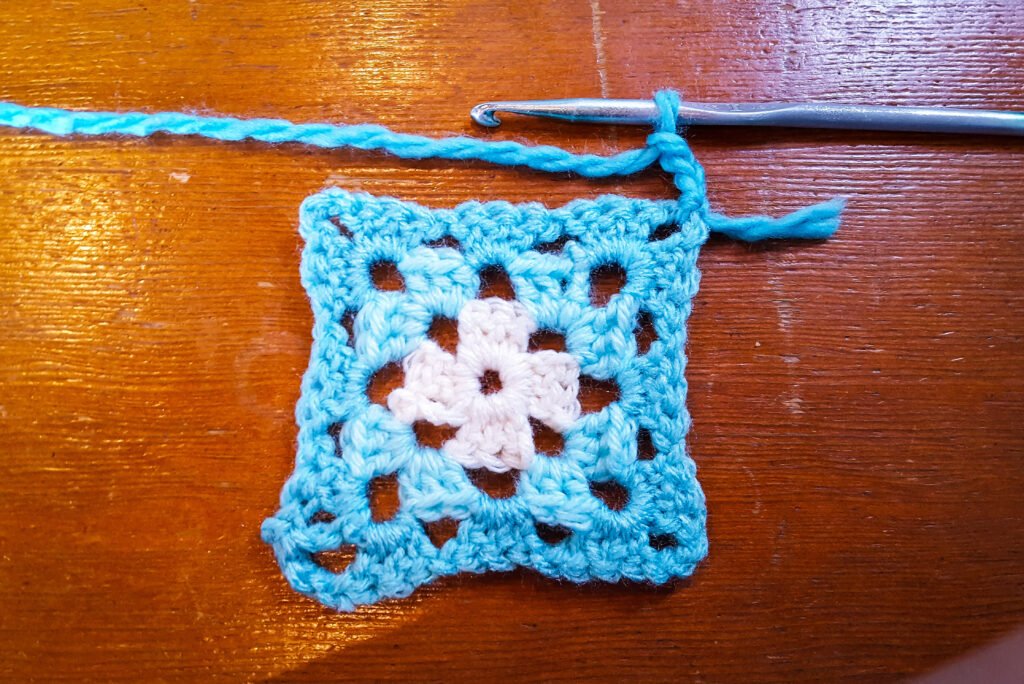
One-sided Granny Square
US English One-Sided Granny Square Pattern:
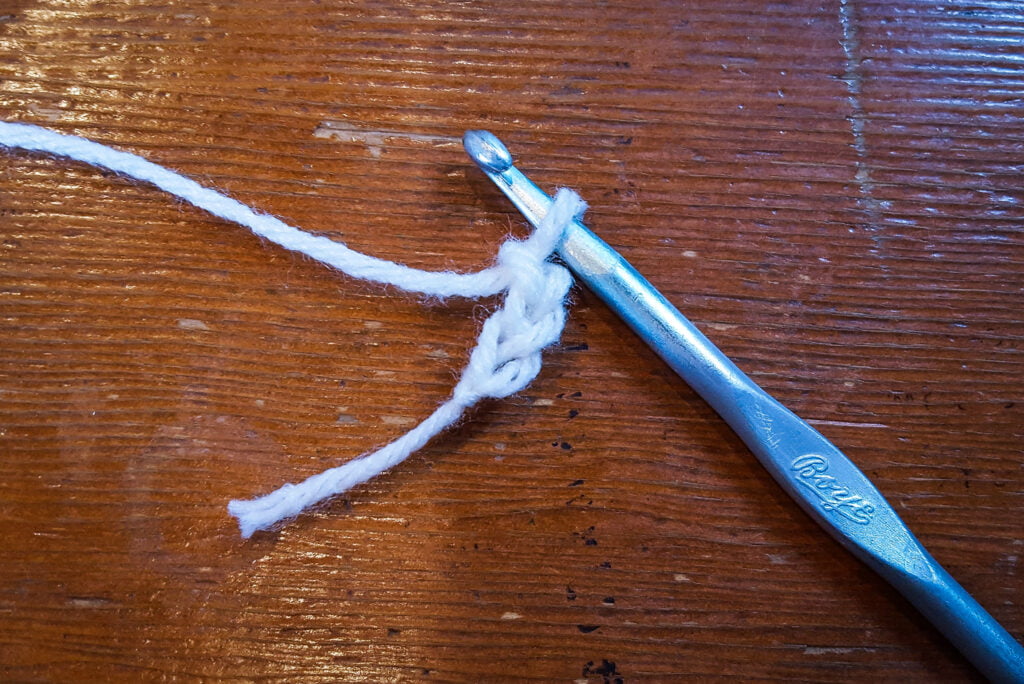
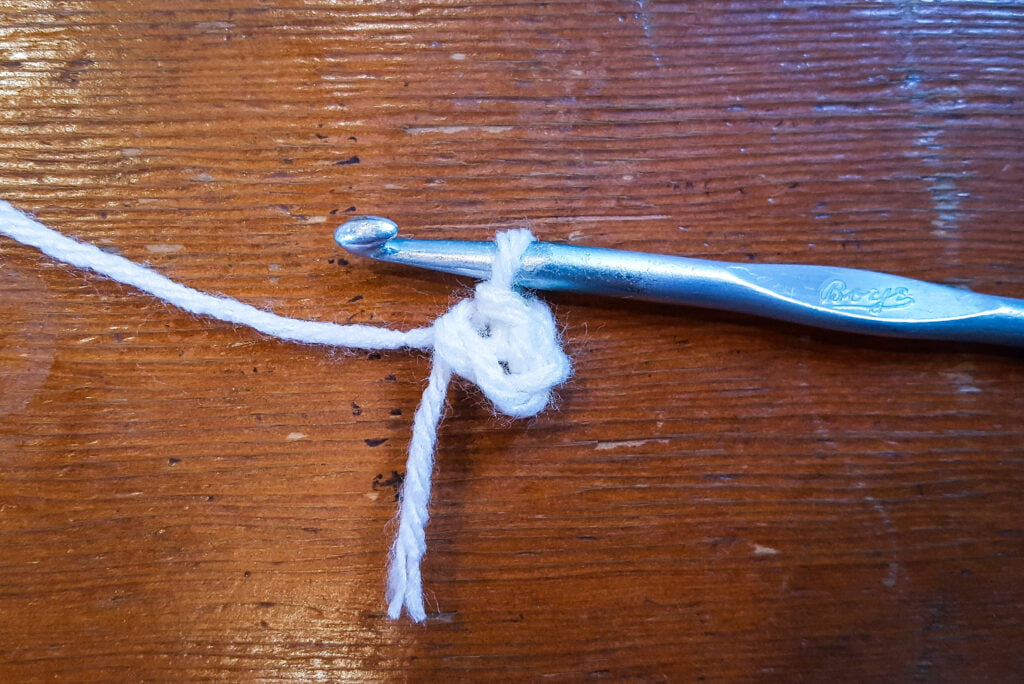
1. Ch 3.
2. Sl St to the first ch to create a small loop.
3. Ch 3 (this 3-ch post counts as your first DC). DC 2 into the 3-ch loop. *Ch 3, DC 3 into the loop*. Rep from * to * 2 more times. Ch 3, Sl St to the 3rd ch of the 3-ch post.
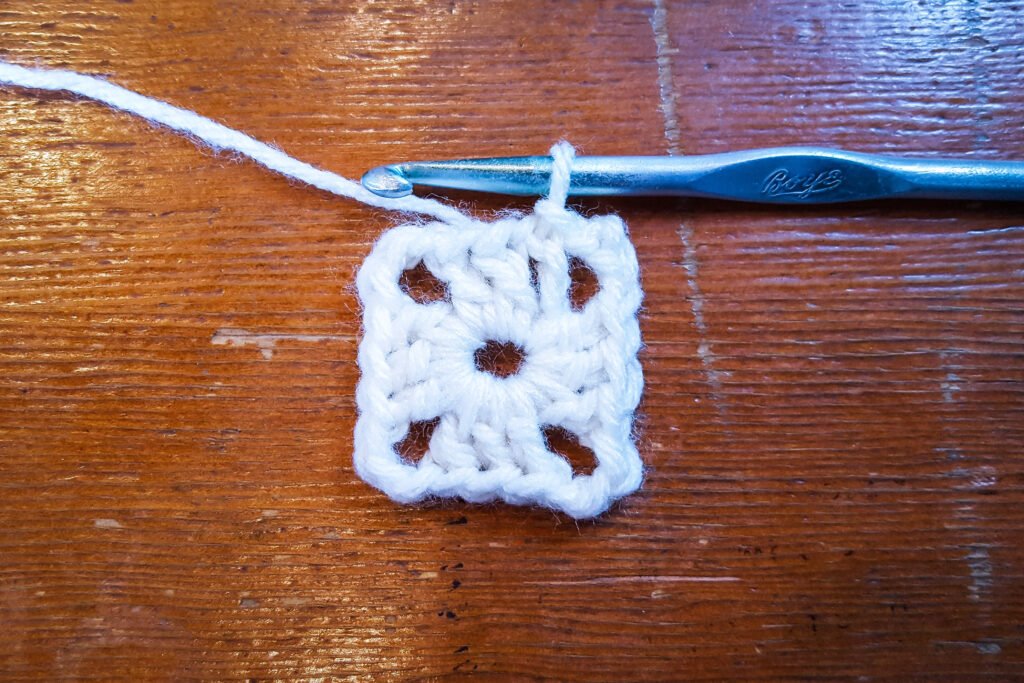
4. Ch 4 (this is your first DC and the first ch between petals), do NOT turn. DC 3 into the next 3-ch corner. Ch 3, DC 3 into the same corner. *Ch 1, DC 3 into the next corner, ch 3, DC into the same corner*. Rep from * to * 1 more time. Ch 1, DC 3 in the next 3-ch corner (the corner you started on), ch 3, DC 2, and Sl St into the third ch of the first 4-ch post.
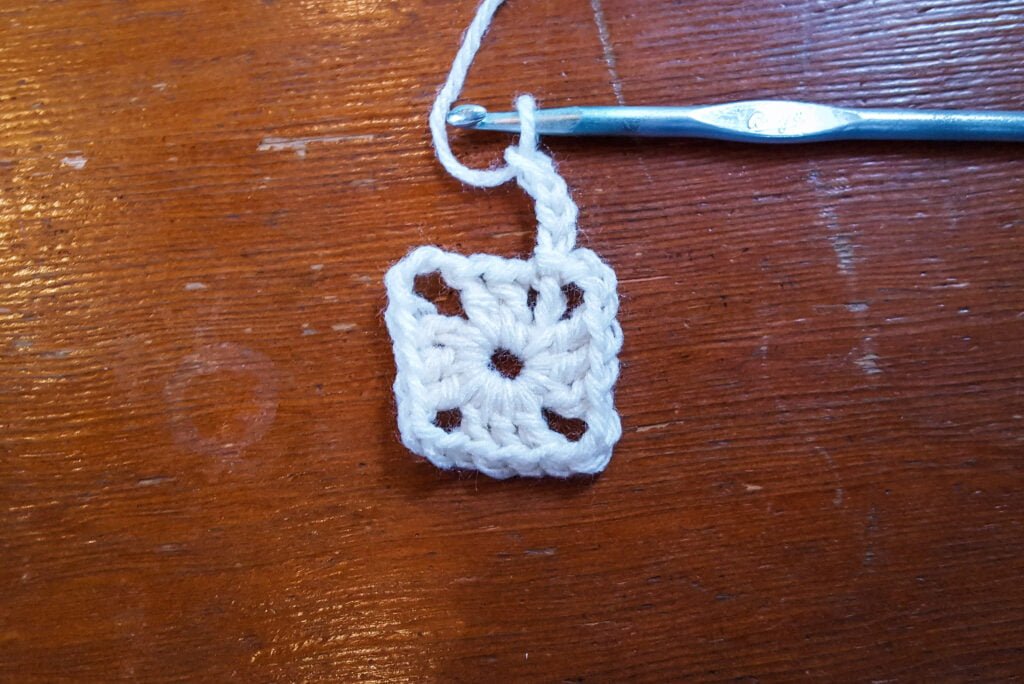
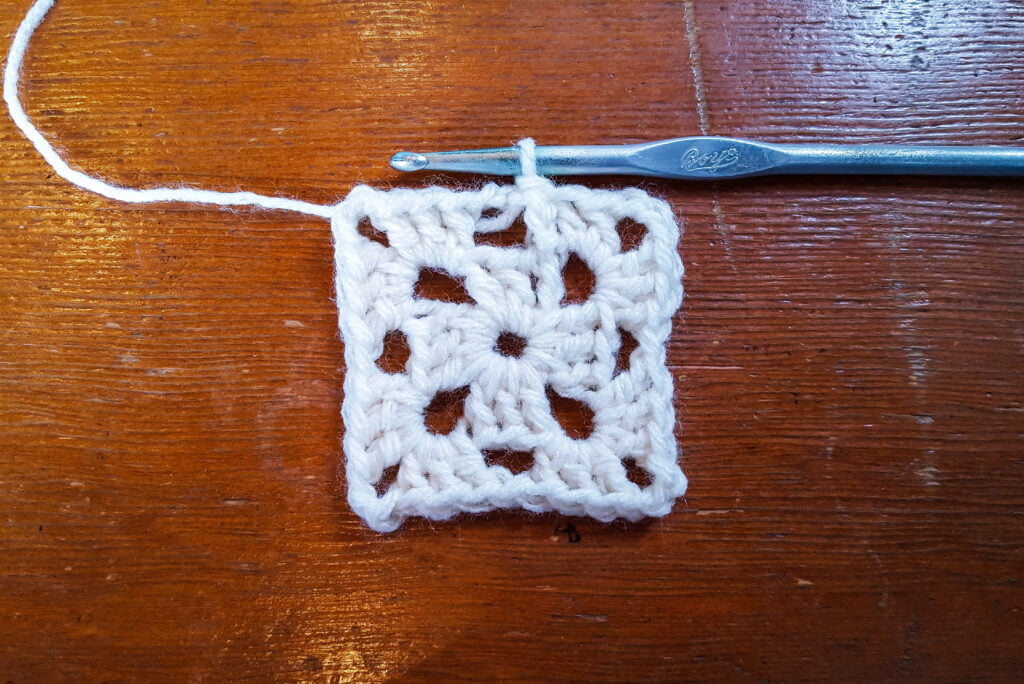
5. Ch 3, do NOT turn, DC 2 in the first 1-ch sp. Ch 1, DC 3 in the next 3-ch corner sp, ch 3, DC 3 in the same corner sp. *Ch 1, DC 3 in the next 1-ch sp, ch 1, DC 3 in the next 3-ch corner, ch 3, DC 3 in the same corner*. Rep from * to * 2 more times. Ch 1, Sl St to the 3rd ch of the first 3-ch post.
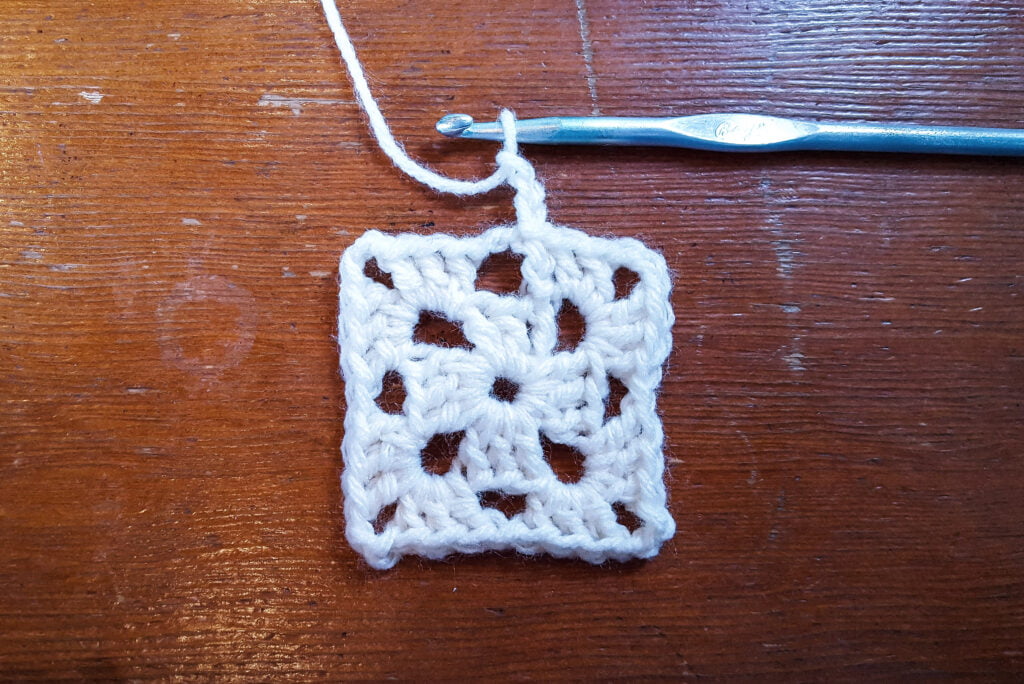
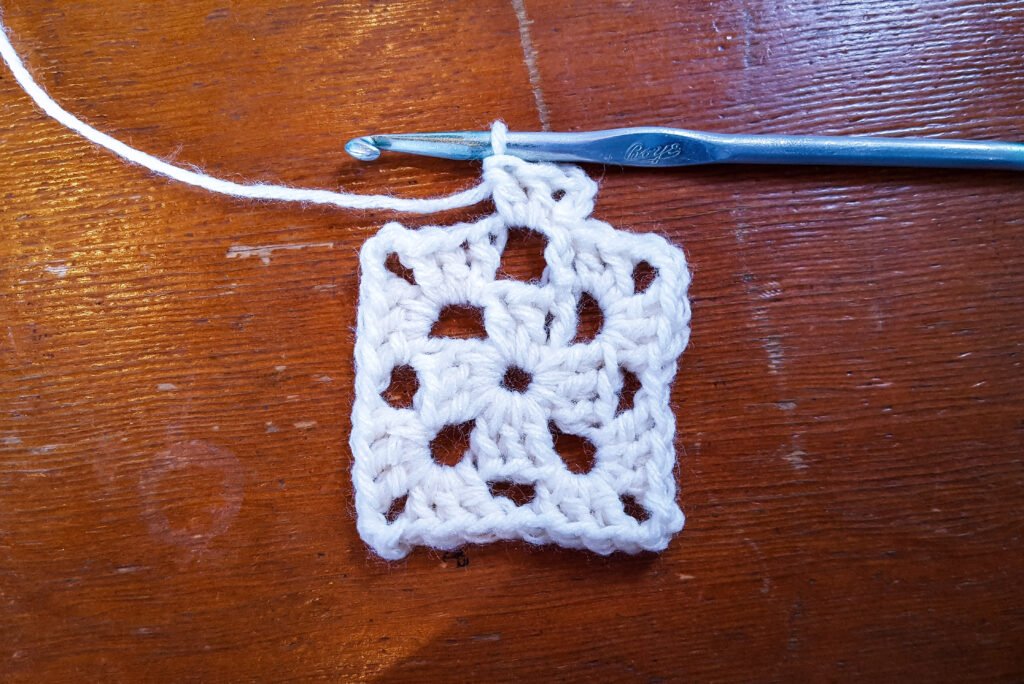
6. Ch 4, do NOT turn. DC 3 in the next 1-ch sp. Ch 1, DC 3 in the next 3-ch corner, ch 3, DC 3 on the same corner. *Ch 1, DC 3 in the next 1-ch sp, ch 1, DC 3 in the next 1-ch sp, ch 1, DC 3 in the next 3-ch corner, ch 3, DC 3 in the same corner*. Rep from * to * 2 more times. Ch 1, DC 2 in the next 1-ch sp (the ones you started with), Sl St into the third ch of the first 4-ch post.
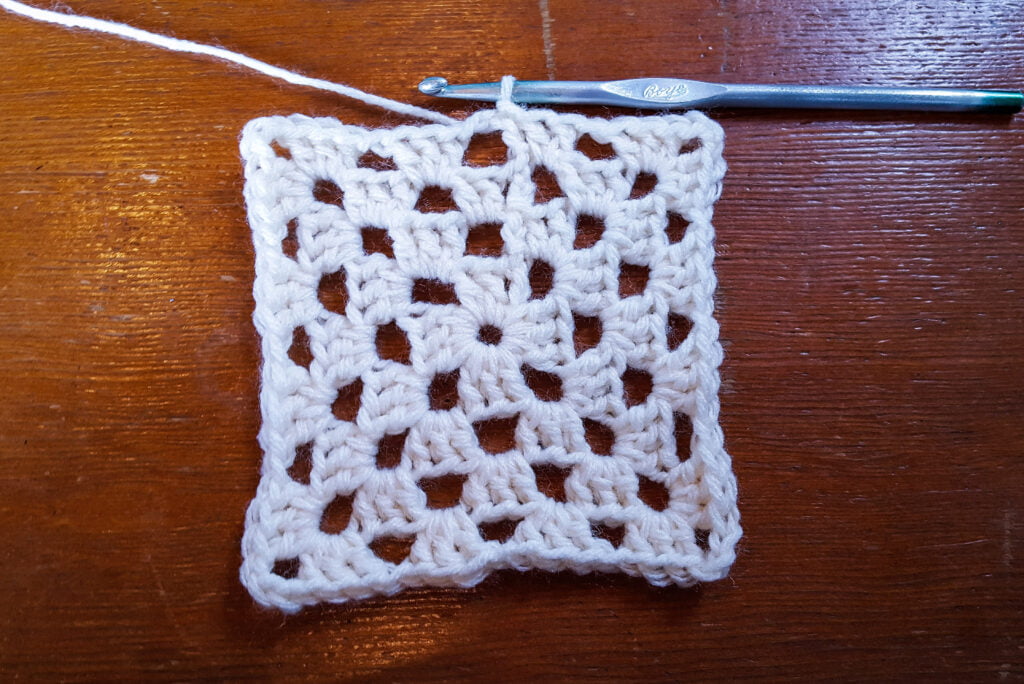
7. Ch 3, do NOT turn, DC 2 in the first 1-ch sp. Ch 1, DC 3 in the next 1-ch sp. Ch 1, DC 3 in the next 3-ch corner sp, ch 3, DC 3 in the same corner sp. *Ch 1, DC 3 in the next 1-ch sp, ch 1, DC 3 in the next 1-ch sp, ch 1, DC 3 in the next 1-ch sp, ch 1, DC 3 in the 3-ch corner, ch 3, DC 3 more in the same corner*. Rep from * to * 2 more times. Ch 1, DC 3 in the next 1-ch sp between petals, ch 1, Sl St to the third ch of the first 3-ch post.

UK English One-Sided Granny Square Pattern:
1. Ch 3.
2. SS to the first ch to create a small loop.
3. Ch 3 (this 3-ch post counts as your first TR). TR 2 into the 3-ch loop. *Ch 3, TR 3 into the loop*. Rep from * to * 2 more times. Ch 3, SS to the 3rd ch of the 3-ch post.
4. Ch 4 (this is your first TR and the first ch between petals), do NOT turn. TR 3 into the next 3-ch corner. Ch 3, TR 3 into the same corner. *Ch 1, TR 3 into the next corner, ch 3, TR into the same corner*. Rep from * to * 1 more time. Ch 1, TR 3 in the next 3-ch corner (the corner you started on), ch 3, TR 2, and SS into the third ch of the first 4-ch post.
5. Ch 3, do NOT turn, TR 2 in the first 1-ch sp. Ch 1, TR 3 in the next 3-ch corner sp, ch 3, TR 3 in the same corner sp. *Ch 1, TR 3 in the next 1-ch sp, ch 1, TR 3 in the next 3-ch corner, ch 3, TR 3 in the same corner*. Rep from * to * 2 more times. Ch 1, SS to the 3rd ch of the first 3-ch post.
6. Ch 4, do NOT turn. TR 3 in the next 1-ch sp. Ch 1, TR 3 in the next 3-ch corner, ch 3, TR 3 on the same corner. *Ch 1, TR 3 in the next 1-ch sp, ch 1, TR 3 in the next 1-ch sp, ch 1, TR 3 in the next 3-ch corner, ch 3, TR 3 in the same corner*. Rep from * to * 2 more times. Ch 1, TR 2 in the next 1-ch sp (the ones you started with), SS into the third ch of the first 4-ch post.
7. Ch 3, do NOT turn, TR 2 in the first 1-ch sp. Ch 1, TR 3 in the next 1-ch sp. Ch 1, TR 3 in the next 3-ch corner sp, ch 3, TR 3 in the same corner sp. *Ch 1, TR 3 in the next 1-ch sp, ch 1, TR 3 in the next 1-ch sp, ch 1, TR 3 in the next 1-ch sp, ch 1, TR 3 in the 3-ch corner, ch 3, TR 3 more in the same corner*. Rep from * to * 2 more times. Ch 1, TR 3 in the next 1-ch sp between petals, ch 1, SS to the third ch of the first 3-ch post.
Two-sided Granny Square
US English Two-Sided Granny Square Pattern:
1. Ch 3.
2. Sl St to the first ch to create a small loop.
3. Ch 3 (this 3-ch post counts as your first DC). DC 2 into the 3-ch loop. *Ch 3, DC 3 into the loop*. Rep from * to * 2 more times. Ch 3, Sl St to the 3rd ch of the 3-ch post.
4. Ch 3, turn. DC 2 in the 3-ch corner you’re in. Ch 3, DC 3 in the same corner. *Ch 1, DC 3 in the next 3-ch corner, ch 3, DC 3 more in the same corner*. Rep from * to * 2 more times. Ch 1, Sl St to the third ch of the 3-ch post you started the Rnd with).
5. Ch 3, turn. DC 2 in the first 1-ch sp. Ch 1, DC 3 in the next 3-ch corner, ch 3, DC 3 in the same corner. *Ch 1, DC 3 in the next 1-ch sp, ch 1, DC 3 in the next 3-ch corner, ch 3, DC 3 in the same corner*. Rep from * to * 2 more times. Ch 1, Sl St to the third ch of the first 3-ch post.
6. Ch 3, turn. DC 2 in the 1-ch sp next to your 3-ch post. Ch 1, DC 3 in the next 3-ch corner, ch 3, DC 3 in the same corner. Ch 1, DC 3 in the next 1-ch sp, ch 1, DC 3 in the next 1-ch sp, ch 1, DC 3 in the next 3-ch corner, ch 3, DC 3 in the same corner*. Rep from * to * 2 more times. Ch 1, DC 3 in the next 1-ch sp, ch 1, Sl St to the third ch of the first 3-ch post.
7. Ch 3, turn. Ch 1, DC 3 in the nex 1-ch sp, ch 1, DC 3 in the next 3-ch corner, ch 3, DC 3 in the same corner. *Ch 1, DC 3 in the next 1-ch sp, ch 1, DC 3 in the next 1-ch sp, ch 1 again, DC 3 in the next 1-ch again, ch 1, DC 3 in the next 3-ch corner, ch 3, DC 3 in the same corner*. Rep from * to * 2 more times. Ch 1, DC 3 in the next 1-ch sp, ch 1, Sl St in the third ch of the first 3-ch post.
UK English Two-Sided Granny Square Pattern:
1. Ch 3.
2. SS to the first ch to create a small loop.
3. Ch 3 (this 3-ch post counts as your first TR). TR 2 into the 3-ch loop. *Ch 3, TR 3 into the loop*. Rep from * to * 2 more times. Ch 3, SS to the 3rd ch of the 3-ch post.
4. Ch 3, turn. TR 2 in the 3-ch corner you’re in. Ch 3, TR 3 in the same corner. *Ch 1, TR 3 in the next 3-ch corner, ch 3, TR 3 more in the same corner*. Rep from * to * 2 more times. Ch 1, SS to the third ch of the 3-ch post you started the Rnd with).
5. Ch 3, turn. TR 2 in the first 1-ch sp. Ch 1, TR 3 in the next 3-ch corner, ch 3, TR 3 in the same corner. *Ch 1, TR 3 in the next 1-ch sp, ch 1, TR 3 in the next 3-ch corner, ch 3, TR 3 in the same corner*. Rep from * to * 2 more times. Ch 1, SS to the third ch of the first 3-ch post.
6. Ch 3, turn. TR 2 in the 1-ch sp next to your 3-ch post. Ch 1, TR 3 in the next 3-ch corner, ch 3, TR 3 in the same corner. Ch 1, TR 3 in the next 1-ch sp, ch 1, TR 3 in the next 1-ch sp, ch 1, TR 3 in the next 3-ch corner, ch 3, TR 3 in the same corner*. Rep from * to * 2 more times. Ch 1, TR 3 in the next 1-ch sp, ch 1, SS to the third ch of the first 3-ch post.
7. Ch 3, turn. Ch 1, TR 3 in the nex 1-ch sp, ch 1, TR 3 in the next 3-ch corner, ch 3, TR 3 in the same corner. *Ch 1, TR 3 in the next 1-ch sp, ch 1, TR 3 in the next 1-ch sp, ch 1 again, TR 3 in the next 1-ch again, ch 1, TR 3 in the next 3-ch corner, ch 3, TR 3 in the same corner*. Rep from * to * 2 more times. Ch 1, TR 3 in the next 1-ch sp, ch 1, SS in the third ch of the first 3-ch post.
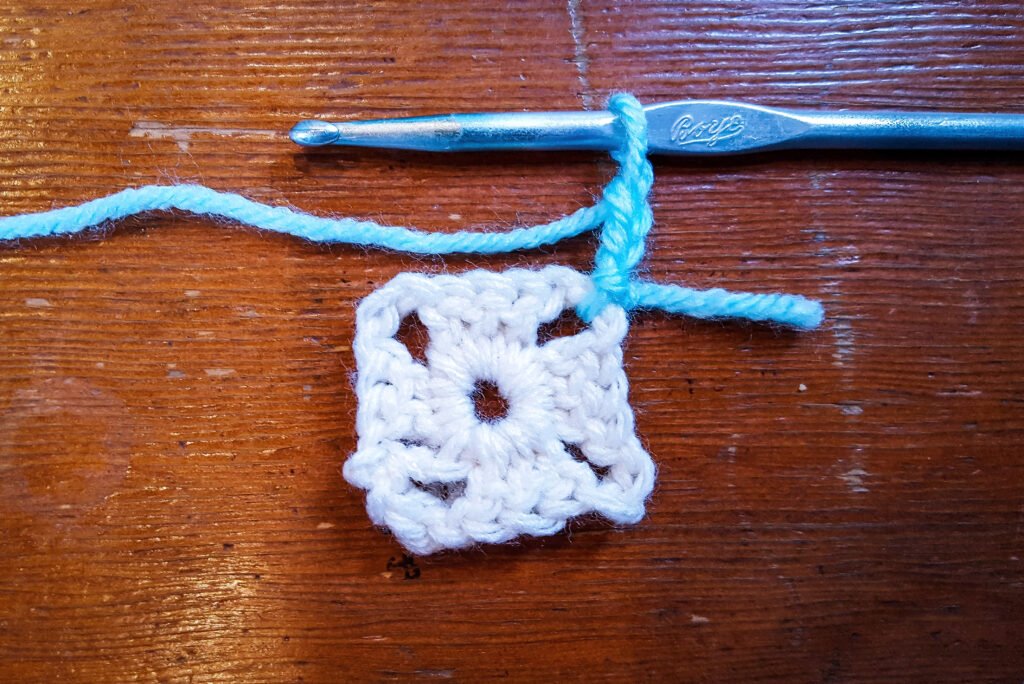
Changing Colors Granny Square
US English Changing-Color Granny Square Pattern:
1. Ch 3.
2. Sl St to the first ch to create a small loop.
3. Ch 3 (this 3-ch post counts as your first DC). DC 2 into the 3-ch loop. *Ch 3, DC 3 into the loop*. Rep from * to * 2 more times. Ch 3, Sl St to the 3rd ch of the 3-ch post. End off. Weave in ends.
4. Attach new color to a new corner; it doesn’t matter if you want a one-sided or two-sided square, just make sure you’re facing the way you want. Create your first DC either by a Sl St and ch 3 (counts as a DC) -or- do 1 standing DC. DC 2 in the same corner you’re beginning in. *Ch 1, DC 3 in the next corner, ch 3, DC 3 in the same corner*. Rep from * to * 2 more times. Ch 1, DC 3 in the first corner, ch 3, Sl St to the first st (either your 3-ch post or your standing DC). End off. Weave in ends.

5. Attach new color to a new corner, facing the desired direction. DC 2 into the same corner you’re beginning in. *Ch 1, DC 3 in the next 1-ch sp, ch 1, DC 3 in the next 3-ch corner, ch 3, DC 3 in the same corner*. Rep from * to * 2 more times. Ch 1, DC 3 in the next 1-ch sp, ch 1, DC 3 in the first corner, Sl St to the first st. End off. Weave in ends.
6. Attach new color to a new corner, facing the desired direction. DC 2 into the same corner you’re beginning in. *Ch 1, DC 3 in the next 1-ch sp, ch 1, DC 3 in the next 1-ch sp, ch 1, DC 3 in the next 3-ch corner, ch 3, DC 3 in the same corner*. Rep from * to * 2 more times. Ch 1, DC 3 in the next 1-ch sp, ch 1, DC 3 in the next 1-ch sp, ch 1, DC 3 in the first corner, Sl St to the first st. End off. Weave in ends.
7. Attach new color to a new corner, facing the desired direction. DC 2 into the same corner you’re beginning in. *Ch 1, DC 3 in the next 1-ch sp, ch 1, DC 3 in the next 1-ch sp, ch 1, DC 3 in the next 1-ch sp, ch 1, DC 3 in the next 3-ch corner, ch 3, DC 3 in the same corner*. Rep from * to * 2 more times. Ch 1, DC 3 in the next 1-ch sp, ch 1, DC 3 in the next 1-ch sp, ch 1, DC 3 in the next 1-ch sp, ch 1, DC 3 in the first corner, ch 3, Sl St to the first st.
UK English Changing-Color Granny Square Pattern:
1. Ch 3.
2. SS to the first ch to create a small loop.
3. Ch 3 (this 3-ch post counts as your first TR). TR 2 into the 3-ch loop. *Ch 3, TR 3 into the loop*. Rep from * to * 2 more times. Ch 3, SS to the 3rd ch of the 3-ch post. Cast off. Weave in ends.
4. Attach new color to a new corner; it doesn’t matter if you want a one-sided or two-sided square, just make sure you’re facing the way you want. Create your first TR either by a SS and ch 3 (counts as a TR) -or- do 1 standing TR. TR 2 in the same corner you’re beginning in. *Ch 1, TR 3 in the next corner, ch 3, TR 3 in the same corner*. Rep from * to * 2 more times. Ch 1, TR 3 in the first corner, ch 3, SS to the first st (either your 3-ch post or your standing TR). Cast off. Weave in ends.
5. Attach new color to a new corner, facing the desired direction. TR 2 into the same corner you’re beginning in. *Ch 1, TR 3 in the next 1-ch sp, ch 1, TR 3 in the next 3-ch corner, ch 3, TR 3 in the same corner*. Rep from * to * 2 more times. Ch 1, TR 3 in the next 1-ch sp, ch 1, TR 3 in the first corner, SS to the first st. Cast off. Weave in ends.
6. Attach new color to a new corner, facing the desired direction. TR 2 into the same corner you’re beginning in. *Ch 1, TR 3 in the next 1-ch sp, ch 1, TR 3 in the next 1-ch sp, ch 1, TR 3 in the next 3-ch corner, ch 3, TR 3 in the same corner*. Rep from * to * 2 more times. Ch 1, TR 3 in the next 1-ch sp, ch 1, TR 3 in the next 1-ch sp, ch 1, TR 3 in the first corner, SS to the first st. Cast off. Weave in ends.
7. Attach new color to a new corner, facing the desired direction. TR 2 into the same corner you’re beginning in. *Ch 1, TR 3 in the next 1-ch sp, ch 1, TR 3 in the next 1-ch sp, ch 1, TR 3 in the next 1-ch sp, ch 1, TR 3 in the next 3-ch corner, ch 3, TR 3 in the same corner*. Rep from * to * 2 more times. Ch 1, TR 3 in the next 1-ch sp, ch 1, TR 3 in the next 1-ch sp, ch 1, TR 3 in the next 1-ch sp, ch 1, TR 3 in the first corner, ch 3, SS to the first st.
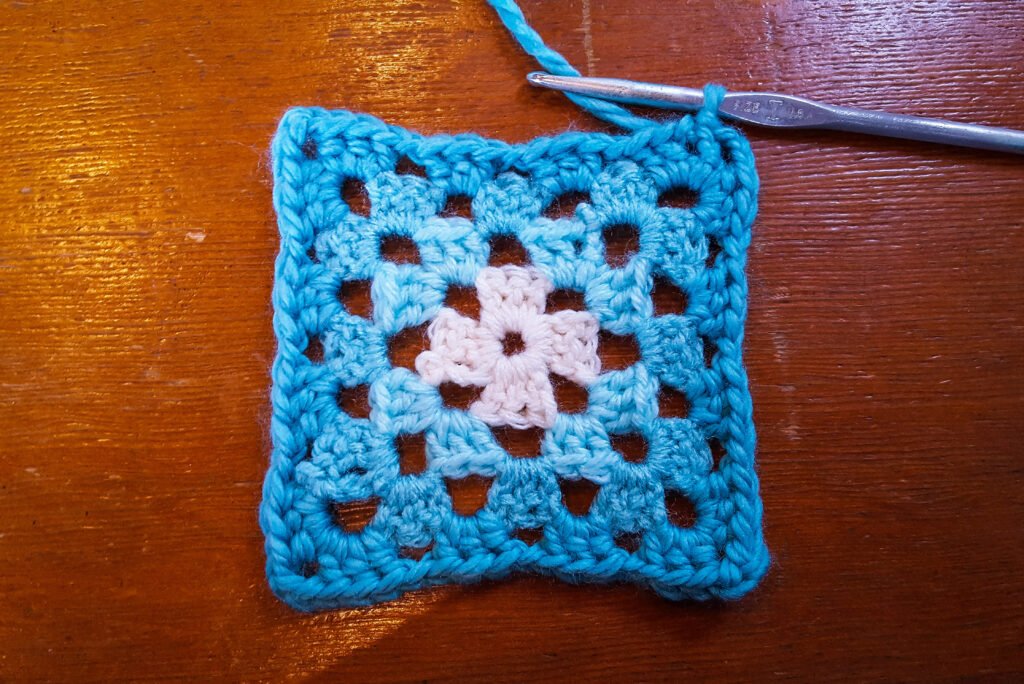
Tah Dah!
And you’re done! I hope these granny square methods help you customize your project to your liking. Go forth and make pretty things!
Remember to drink water, have a snack if you haven’t eaten, and pause and stretch a bit if you’ve been down too long.
And remember that you can follow Family Craft Studio on Instagram, Pinterest, and Facebook.
Happy crafting!